Campaigns
Plan, staff, run, and measure influencer and creator campaigns from a single brand workspace.
The Campaigns area is where your brand runs the full creator journey: write a brief, let Cyrqle match creators to it, build a shortlist, reach out and agree terms, take the campaign live, then track attribution and pay creators. Everything lives in one campaign workspace with tabs, so you rarely leave the page once a campaign is open.
Before you start
- Your workspace must be a brand (or an agency acting on behalf of a brand client — agencies pick a client first, then work inside that brand's campaign).
- You need an active plan. Creating a campaign checks your billing and campaign quota; if you have no plan or you've hit your monthly limit, you'll be prompted to upgrade.
- It helps to have your brand kit (logo, colours, assets) and at least one product or offer ready, since the brief and content tabs reference them.
- Funding and payouts require Stripe billing to be set up — see the linked payouts guide.
Open the Campaigns area
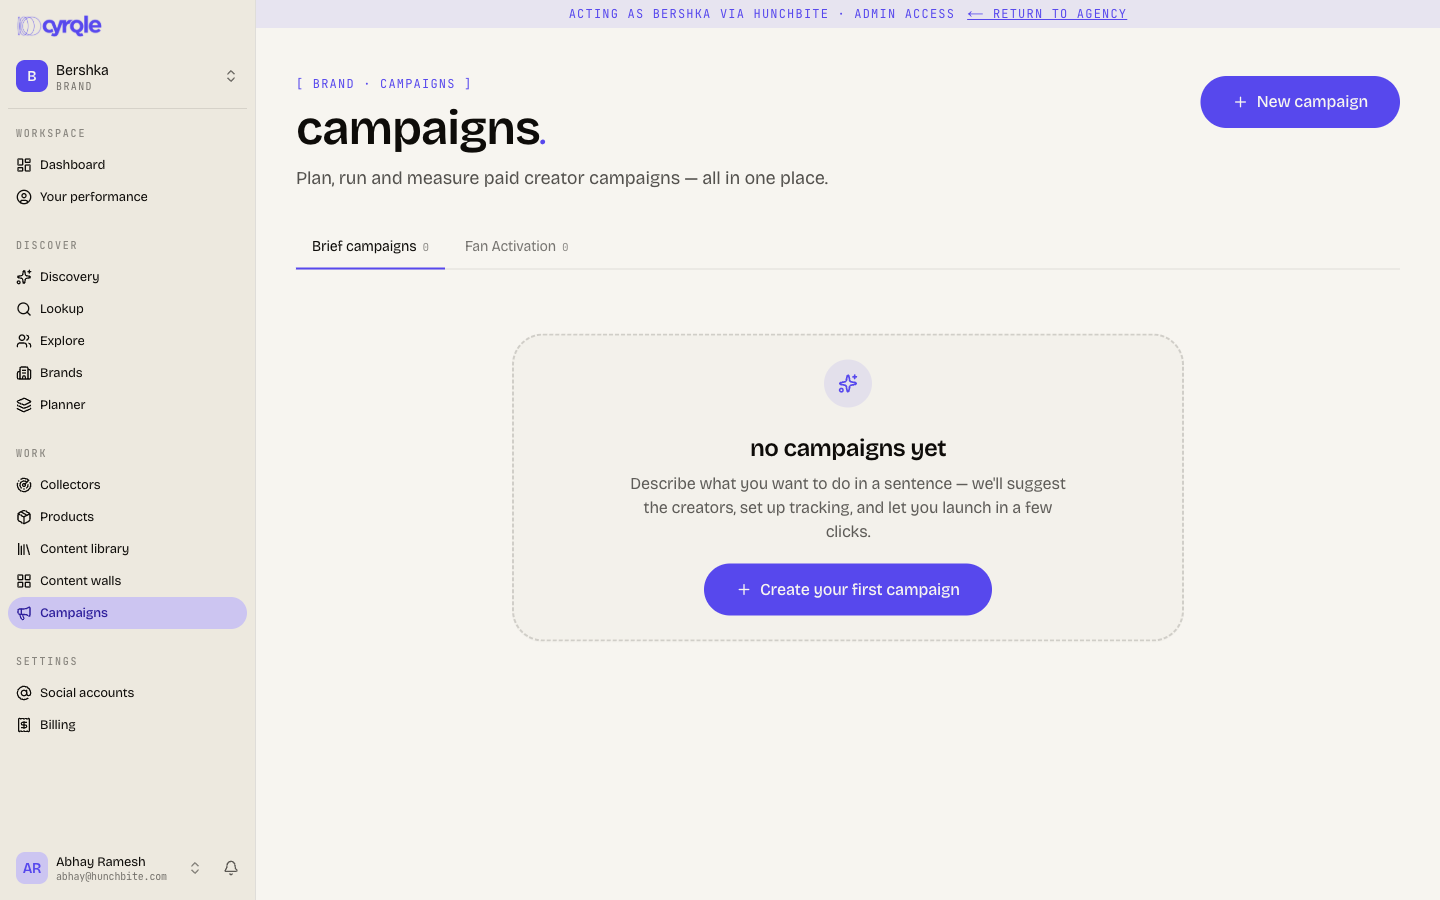
From your workspace, go to Campaigns. You'll see two tabs at the top:
- Brief — your standard creator campaigns (the main flow this guide covers).
- Fan activation — lightweight offline/community activations, with their own list and entry points.
The Brief tab groups your campaigns into Active, Drafts, and Closed. If you've closed campaigns before, a Quick start row offers one-click "repeat" cards to clone a past campaign as a new draft. Each campaign card shows its status, the creator count, and how much budget is committed against the total.
Create a campaign brief
- Click New campaign (top right of the Brief tab).
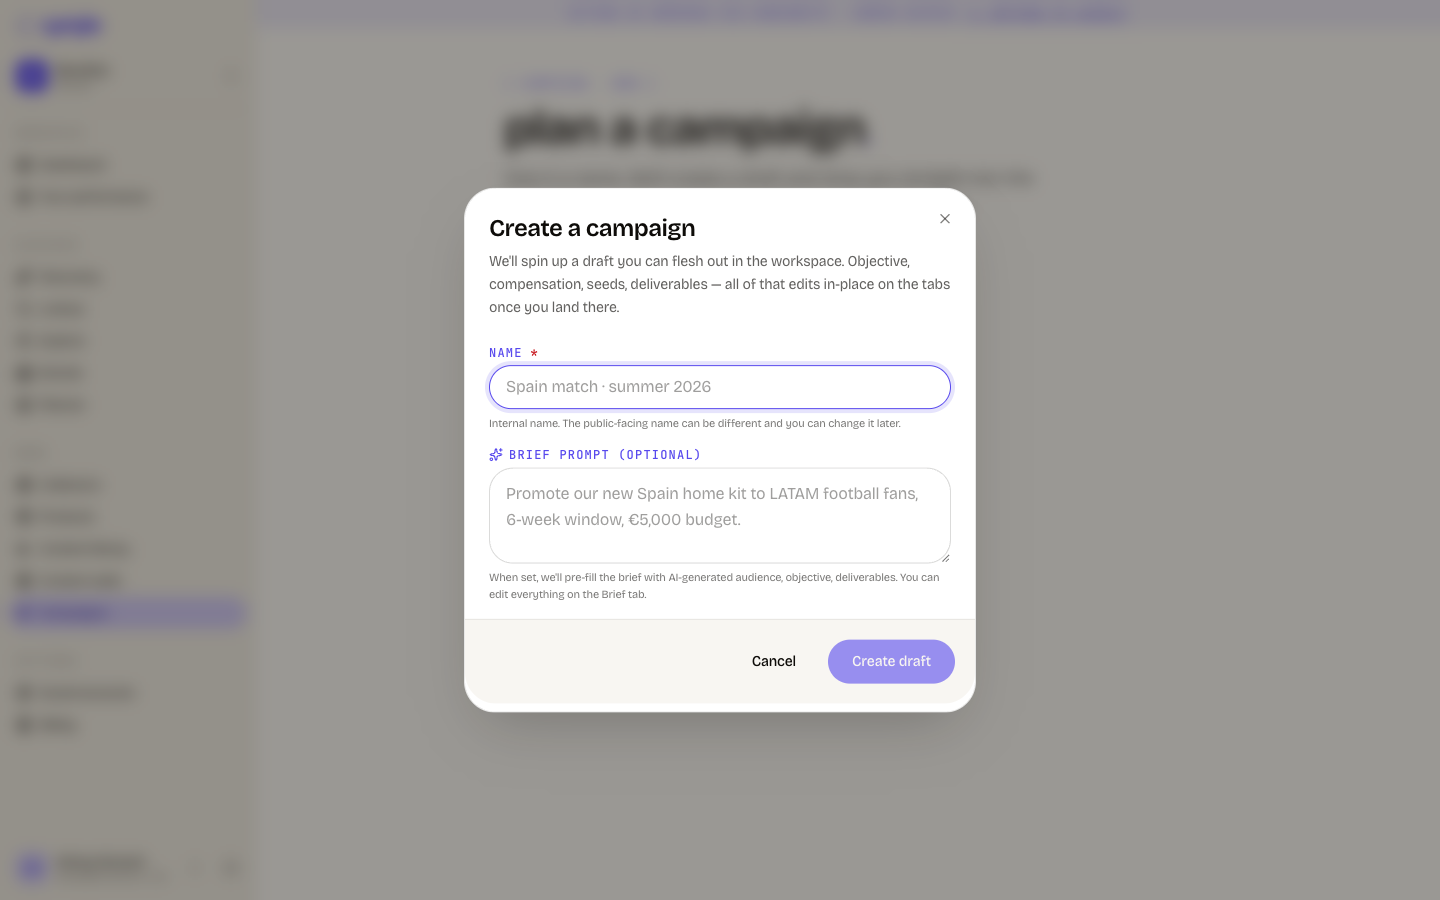
- In the Create campaign dialog, enter a Name (required).
- Optionally, add an AI brief prompt — a few sentences describing the campaign in plain language. Cyrqle uses this to draft the brief for you.
- Click Create draft.
Cyrqle creates a draft campaign and drops you straight into the campaign workspace on the Brief tab. You don't fill in a long form up front — every other field is edited in place on the tabs, and changes save as you go.
Fill in the brief
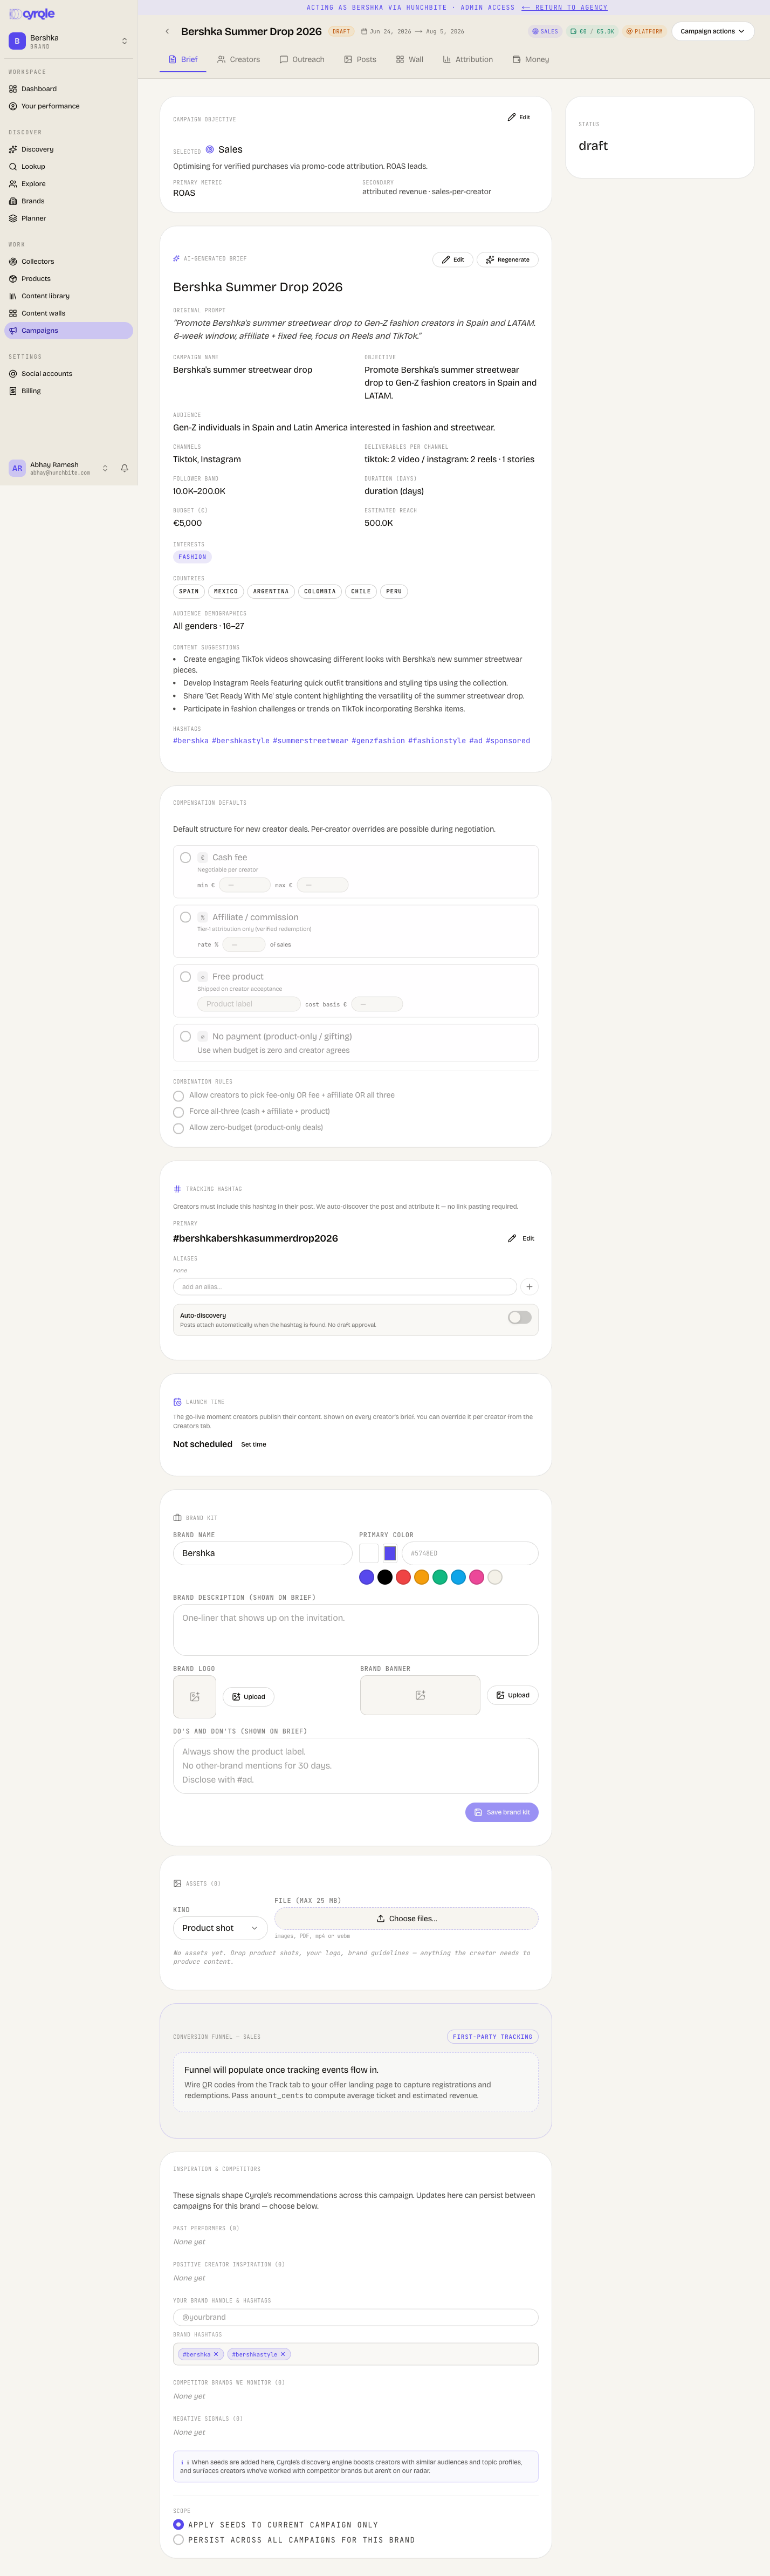
The Brief tab is the heart of the campaign. Work through the cards top to bottom:
- Campaign objective — what the campaign is for (for example sales, leads, traffic, awareness). This shapes matching and, for funnel objectives, unlocks a first-party tracking panel.
- AI brief — if you gave a prompt, your generated brief appears here with its title and description. You can edit it inline or regenerate it.
- Compensation defaults — set the default deal shape: a cash fee range, an affiliate percentage, product/seeding, or any combination. These become the starting terms when you invite creators. (Compensation modes: Fixed, Affiliate, Seeding, Hybrid.)
- Tracking hashtag — the hashtags Cyrqle watches to attribute posts to this campaign. The hashtag can be locked once the campaign is running.
- Launch window — the date the campaign goes live. You can override the launch date per creator later.
- Brand kit & assets — the logos, colours, and downloadable assets creators will use.
- Inspiration & competitors — seed the matching engine with creators you like ("positive" seeds), creators to avoid ("negative" seeds), and competitor brands. Past performers from your previous campaigns are suggested here too.
The right column always shows the campaign's current status.
Review the matched cluster and build a shortlist
Open the Creators tab. You build your roster here in one of two ways:
- Add creator by handle — paste an Instagram handle. If Cyrqle already has them indexed they're added instantly; if not, Cyrqle pulls their profile and adds them in one step. They land in your pool as Shortlisted.
- Invite more — pull in specific creators you've found in Explore or Lookup.
Automatic matching is on the way
The Discover creators button opens a matching drawer that ranks creators against your brief, seeds, and competitor signals (the cluster, drawn from three buckets: opted-in creators, creators identified in Cyrqle's database, and broader discovery). Full auto-matching is still rolling out — until then, the drawer may return few or no results, so add creators by handle or invite them from Explore and Lookup.
Creators you add become your shortlist.
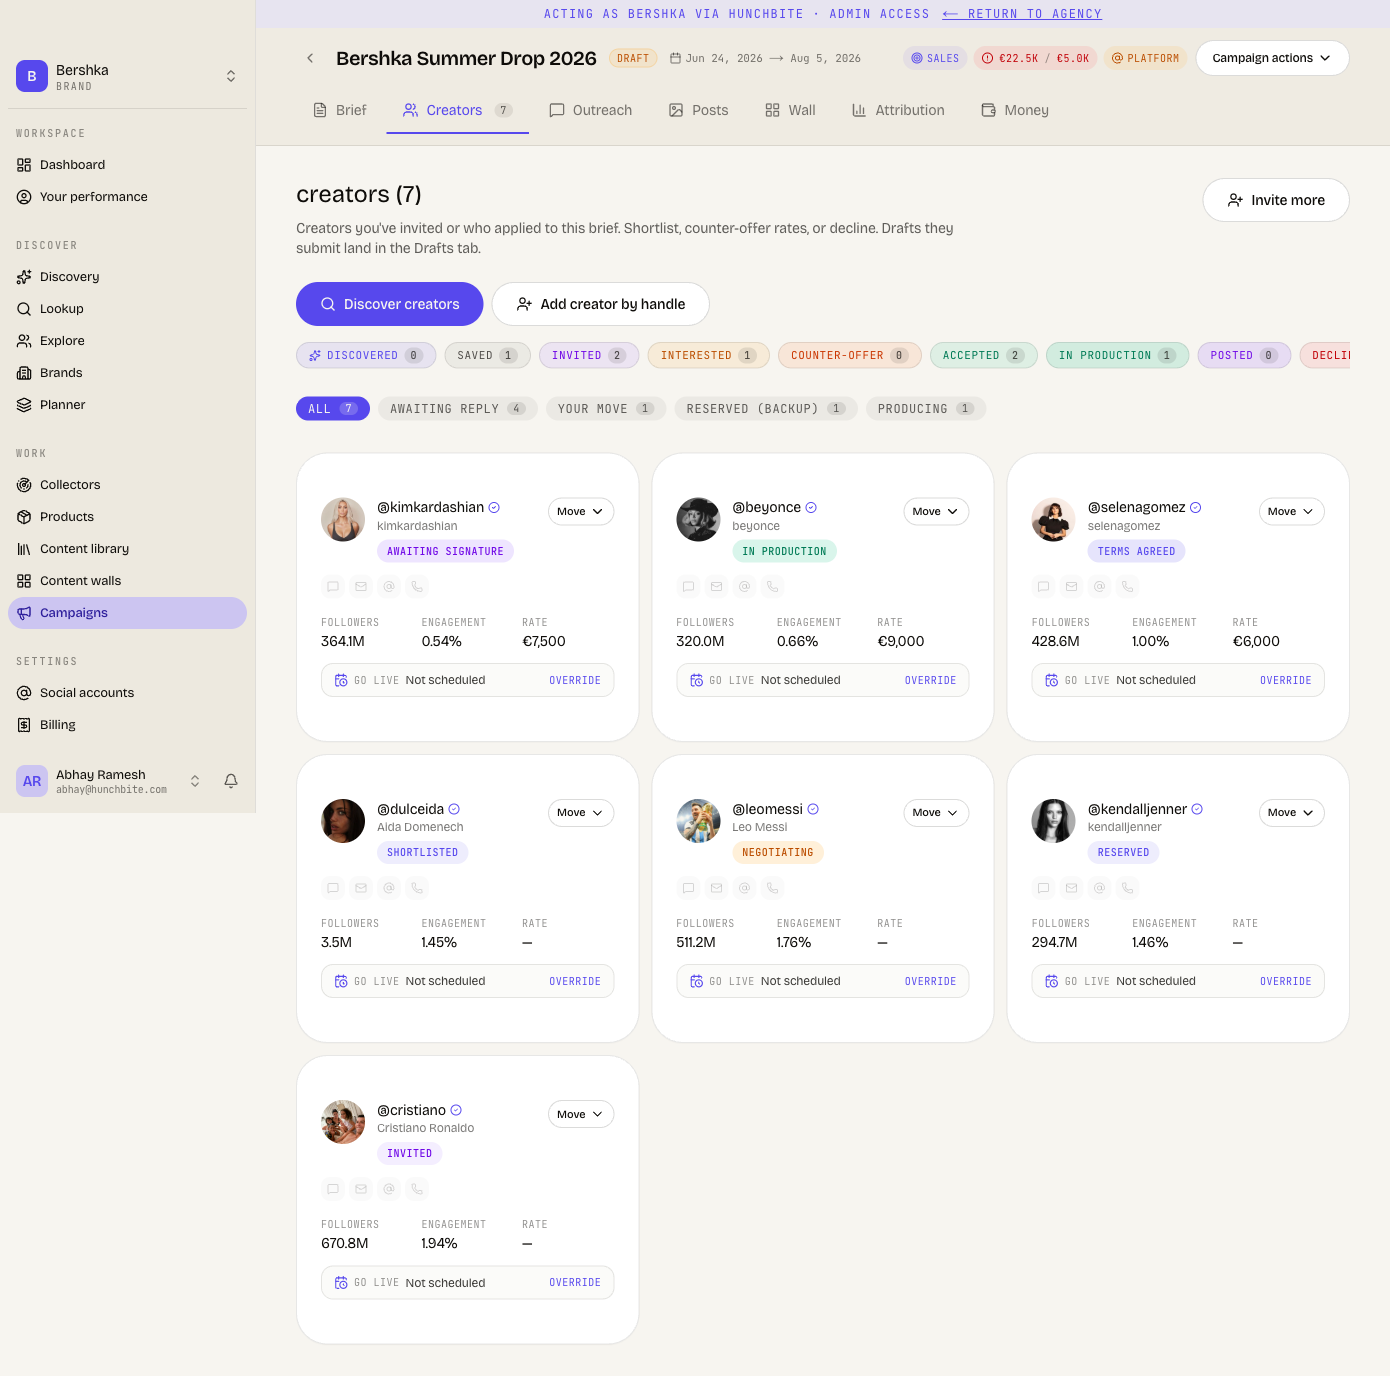
Shortlisted and invited creators appear back on the Creators tab as cards, each with a status badge, follower/engagement/rate stats, and contact-channel indicators. Filter chips across the top (for example Awaiting reply, Your move, Reserved (backup), Producing, Completed, Lost) let you focus on creators that need attention. You can also Add by handle or use Invite more to pull in specific creators from Explore or Lookup.
Send outreach and invites
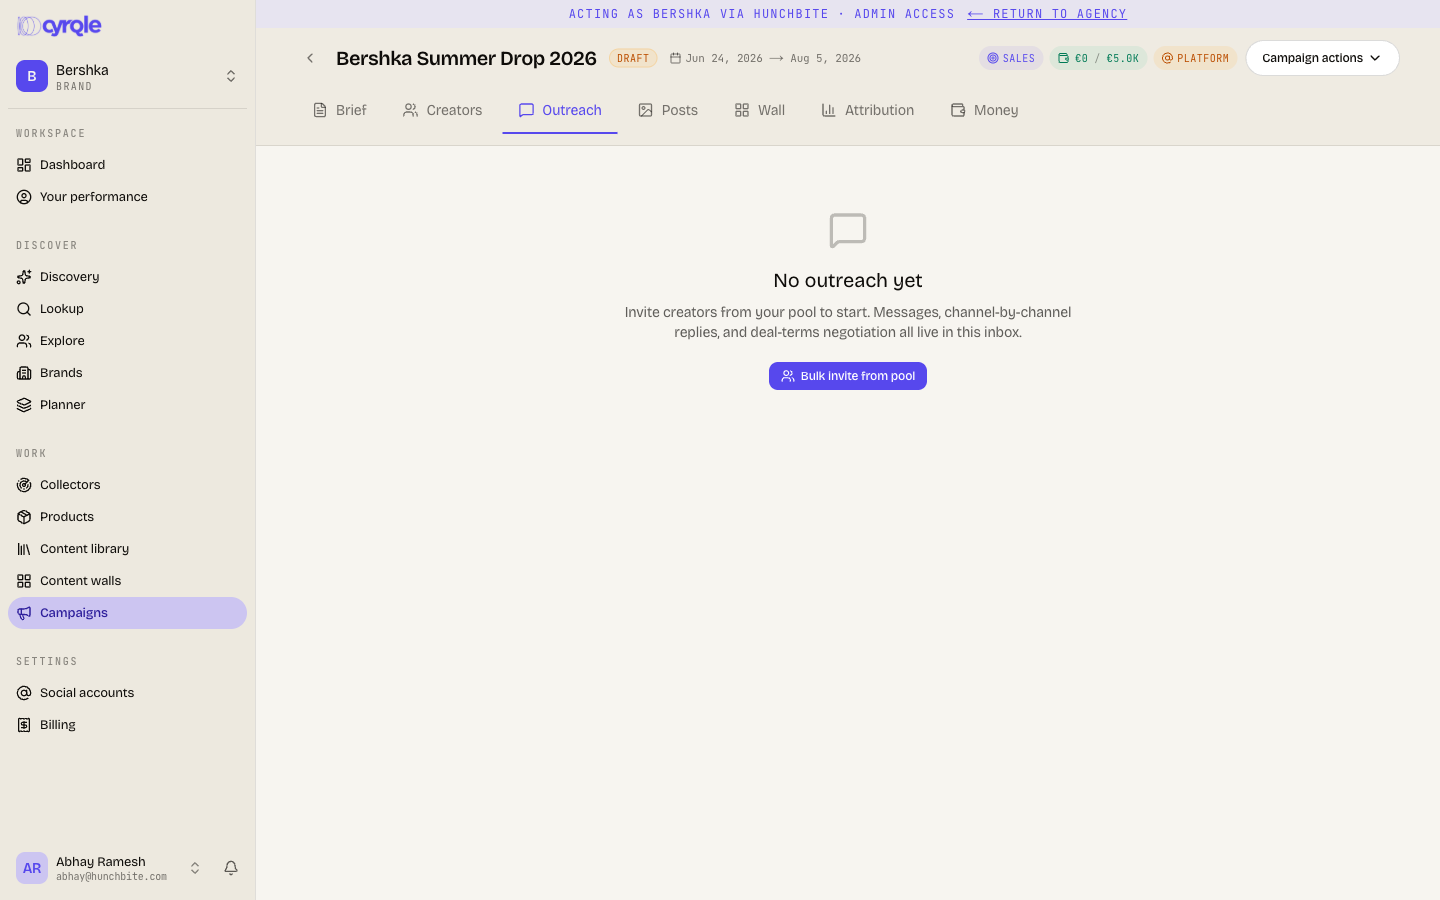
Each creator card has a status menu where you can shortlist, send a reminder, counter-offer a rate, accept, or decline. To work conversations end to end, open the Outreach tab. It's a three-pane view:
- Thread list — every creator conversation for this campaign, with response stats at the top.
- Conversation — the message thread with the creator, where you reply and send templates.
- Deal terms — the live terms for that creator (compensation, deliverables, rights), which you negotiate alongside the chat.
From here you can run bulk invites, log a manual touch (for example an email you sent outside Cyrqle), and move a creator toward an agreement.
Agree terms and get the contract signed
As you negotiate, a creator moves through statuses you can see on their card: Invited → Accepted invitation → Negotiating → Terms agreed → Awaiting signature → In production. When terms are agreed, you send the agreement for e-signature from the deal/terms surface. Once signed, the creator is under contract and ready to produce.
Take the campaign live
Use the campaign status actions menu (in the workspace header) to move the campaign through its lifecycle: Activate / start matching → reviewing applicants → awaiting acceptance → in production → drafts to review → live. Some transitions (pausing, cancelling) ask you to confirm. You can also set or override the launch window per creator from their card, so individual creators go live on their own schedule.
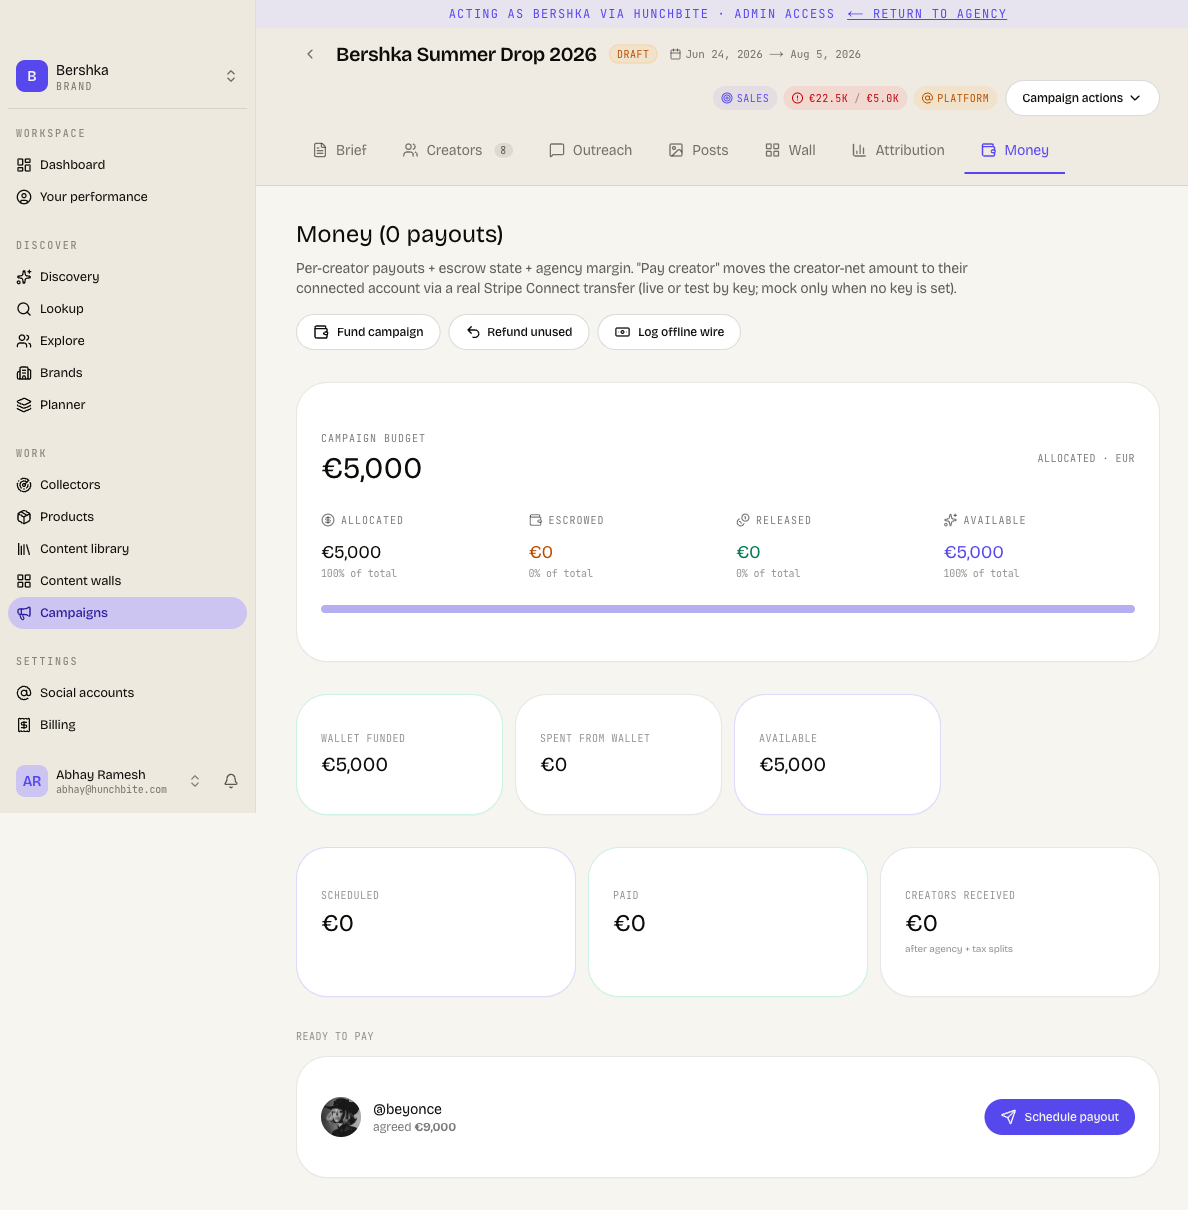
Before money moves, open the Money tab to Fund campaign (load the campaign wallet), review the budget breakdown (escrowed vs released vs available), and, where needed, record a manual wire transfer. Funding the wallet is what lets payouts release later.
Monitor content, posts, and the wall
Once creators are producing, three tabs help you keep track:
- Content / Drafts — drafts creators submit for approval (when your campaign uses approval mode), with a required-elements checklist.
- Posts — the live posts attributed to the campaign, with stats and compliance flags.
- Wall — curate creator content into your content wall and verify tags. See the Content walls guide for the full flow.
The attention bar at the top of the workspace surfaces what needs you now — applicants to review, drafts awaiting approval, and pending payouts — so you don't have to hunt across tabs.
Approve drafts
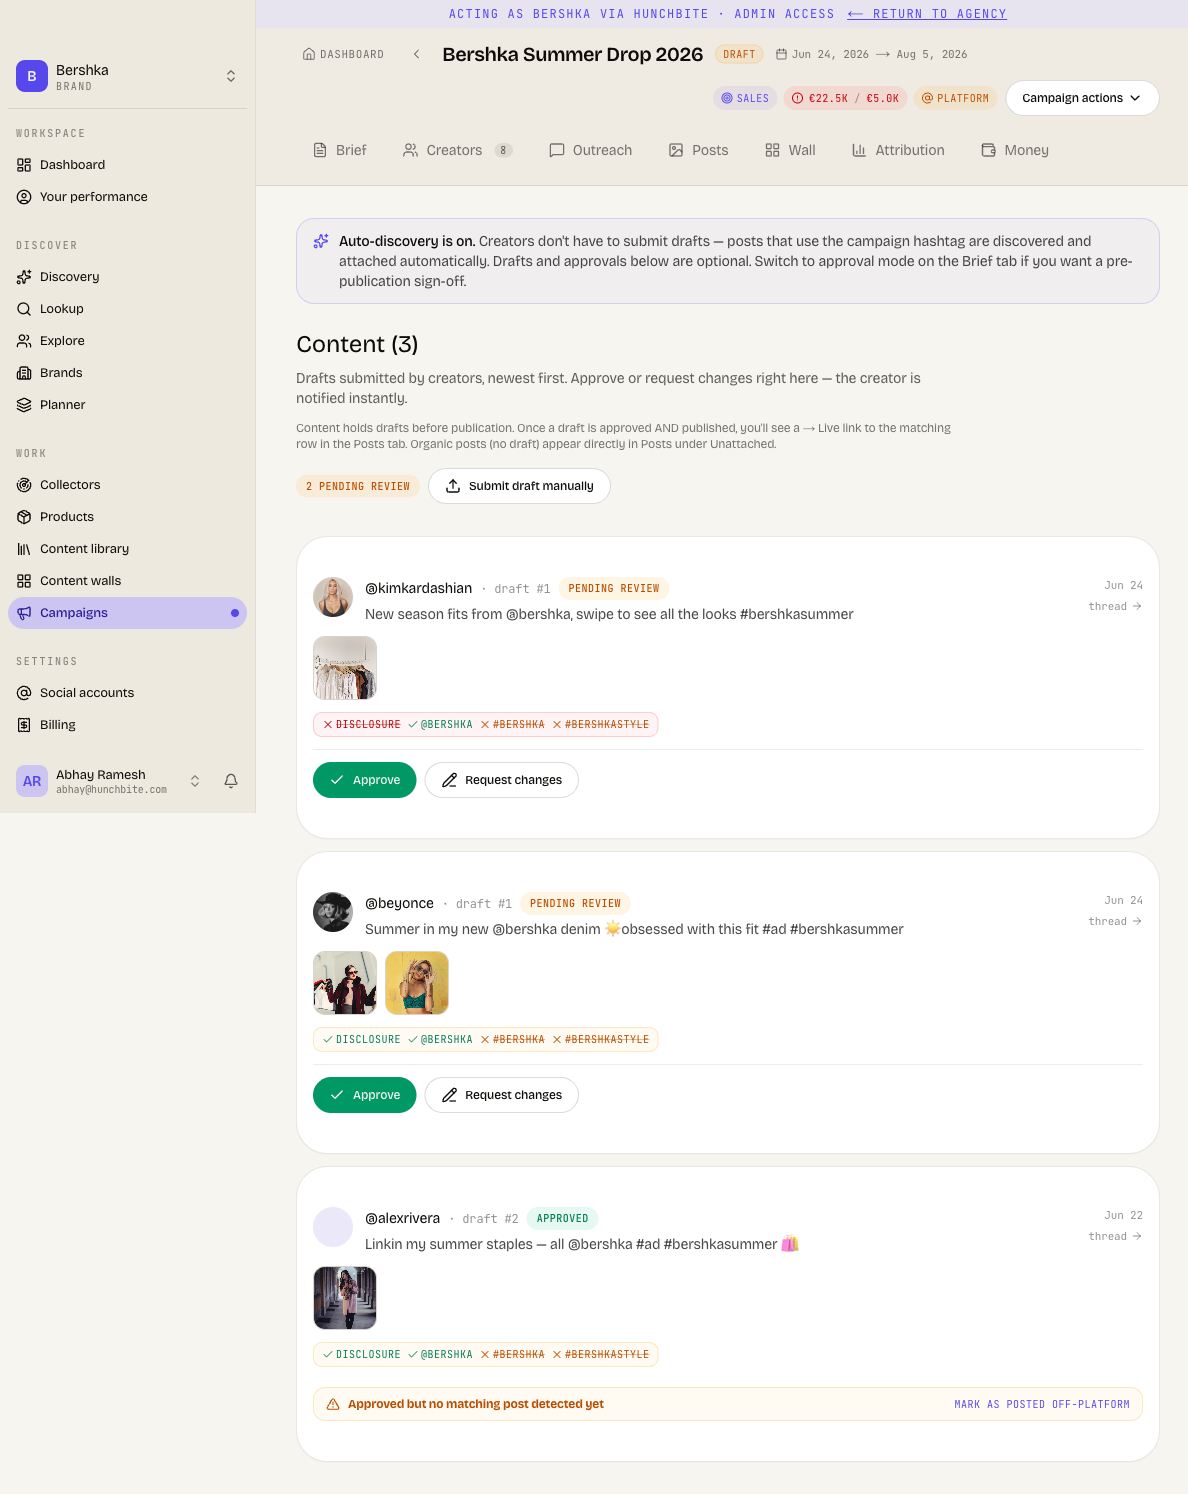
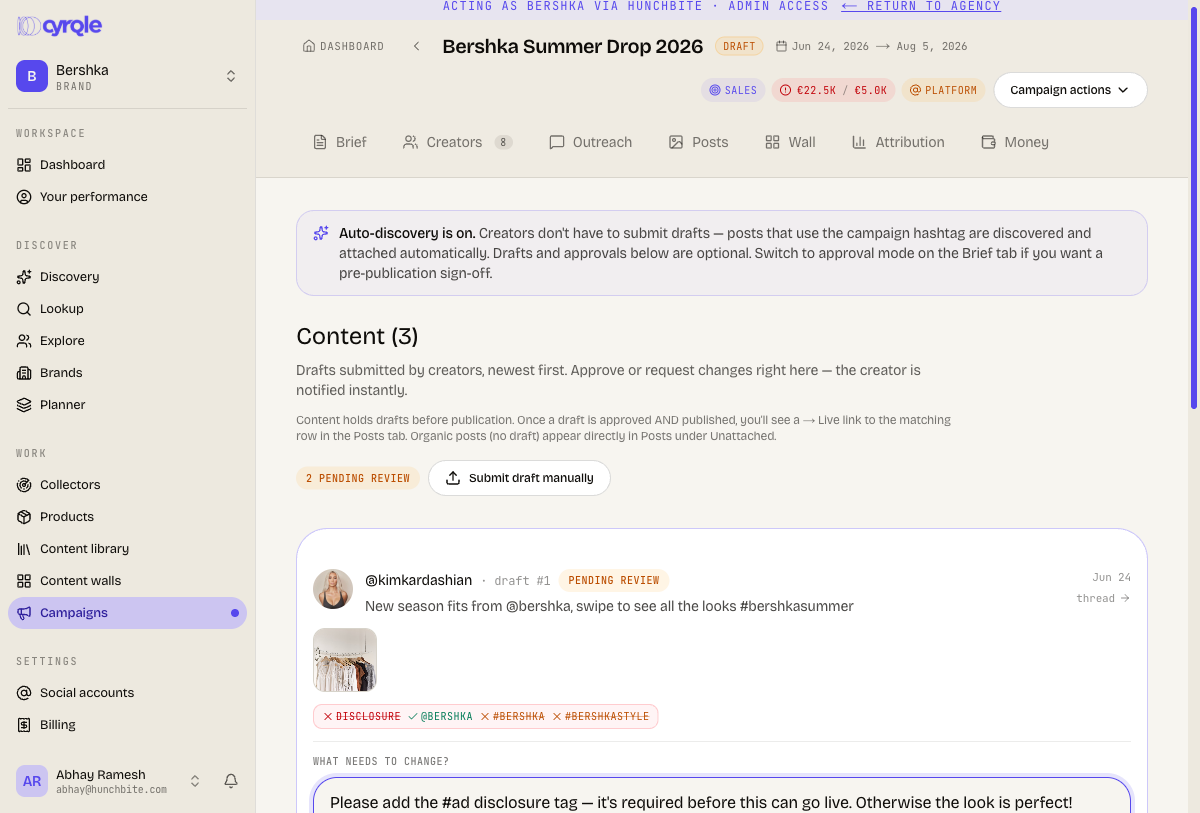
The Content tab is your pre-publication review queue. Drafts creators submit appear newest first, each with its caption, attached media, and a required-elements checklist that automatically checks the caption against your campaign's compliance rules — disclosure (for example #ad), the brand mention, and the campaign hashtag. Missing blocking elements are flagged in red so you don't approve content that breaks disclosure rules.
For each draft, Approve it or Request changes with a note. The creator is notified instantly; once an approved draft is published, a → Live link connects it to the matching row in the Posts tab.
Approval mode is optional
When auto-discovery is on, creators don't have to submit drafts — posts that use the campaign hashtag are discovered and attached automatically. Switch to approval mode on the Brief tab if you want pre-publication sign-off.
Run a UGC-only campaign
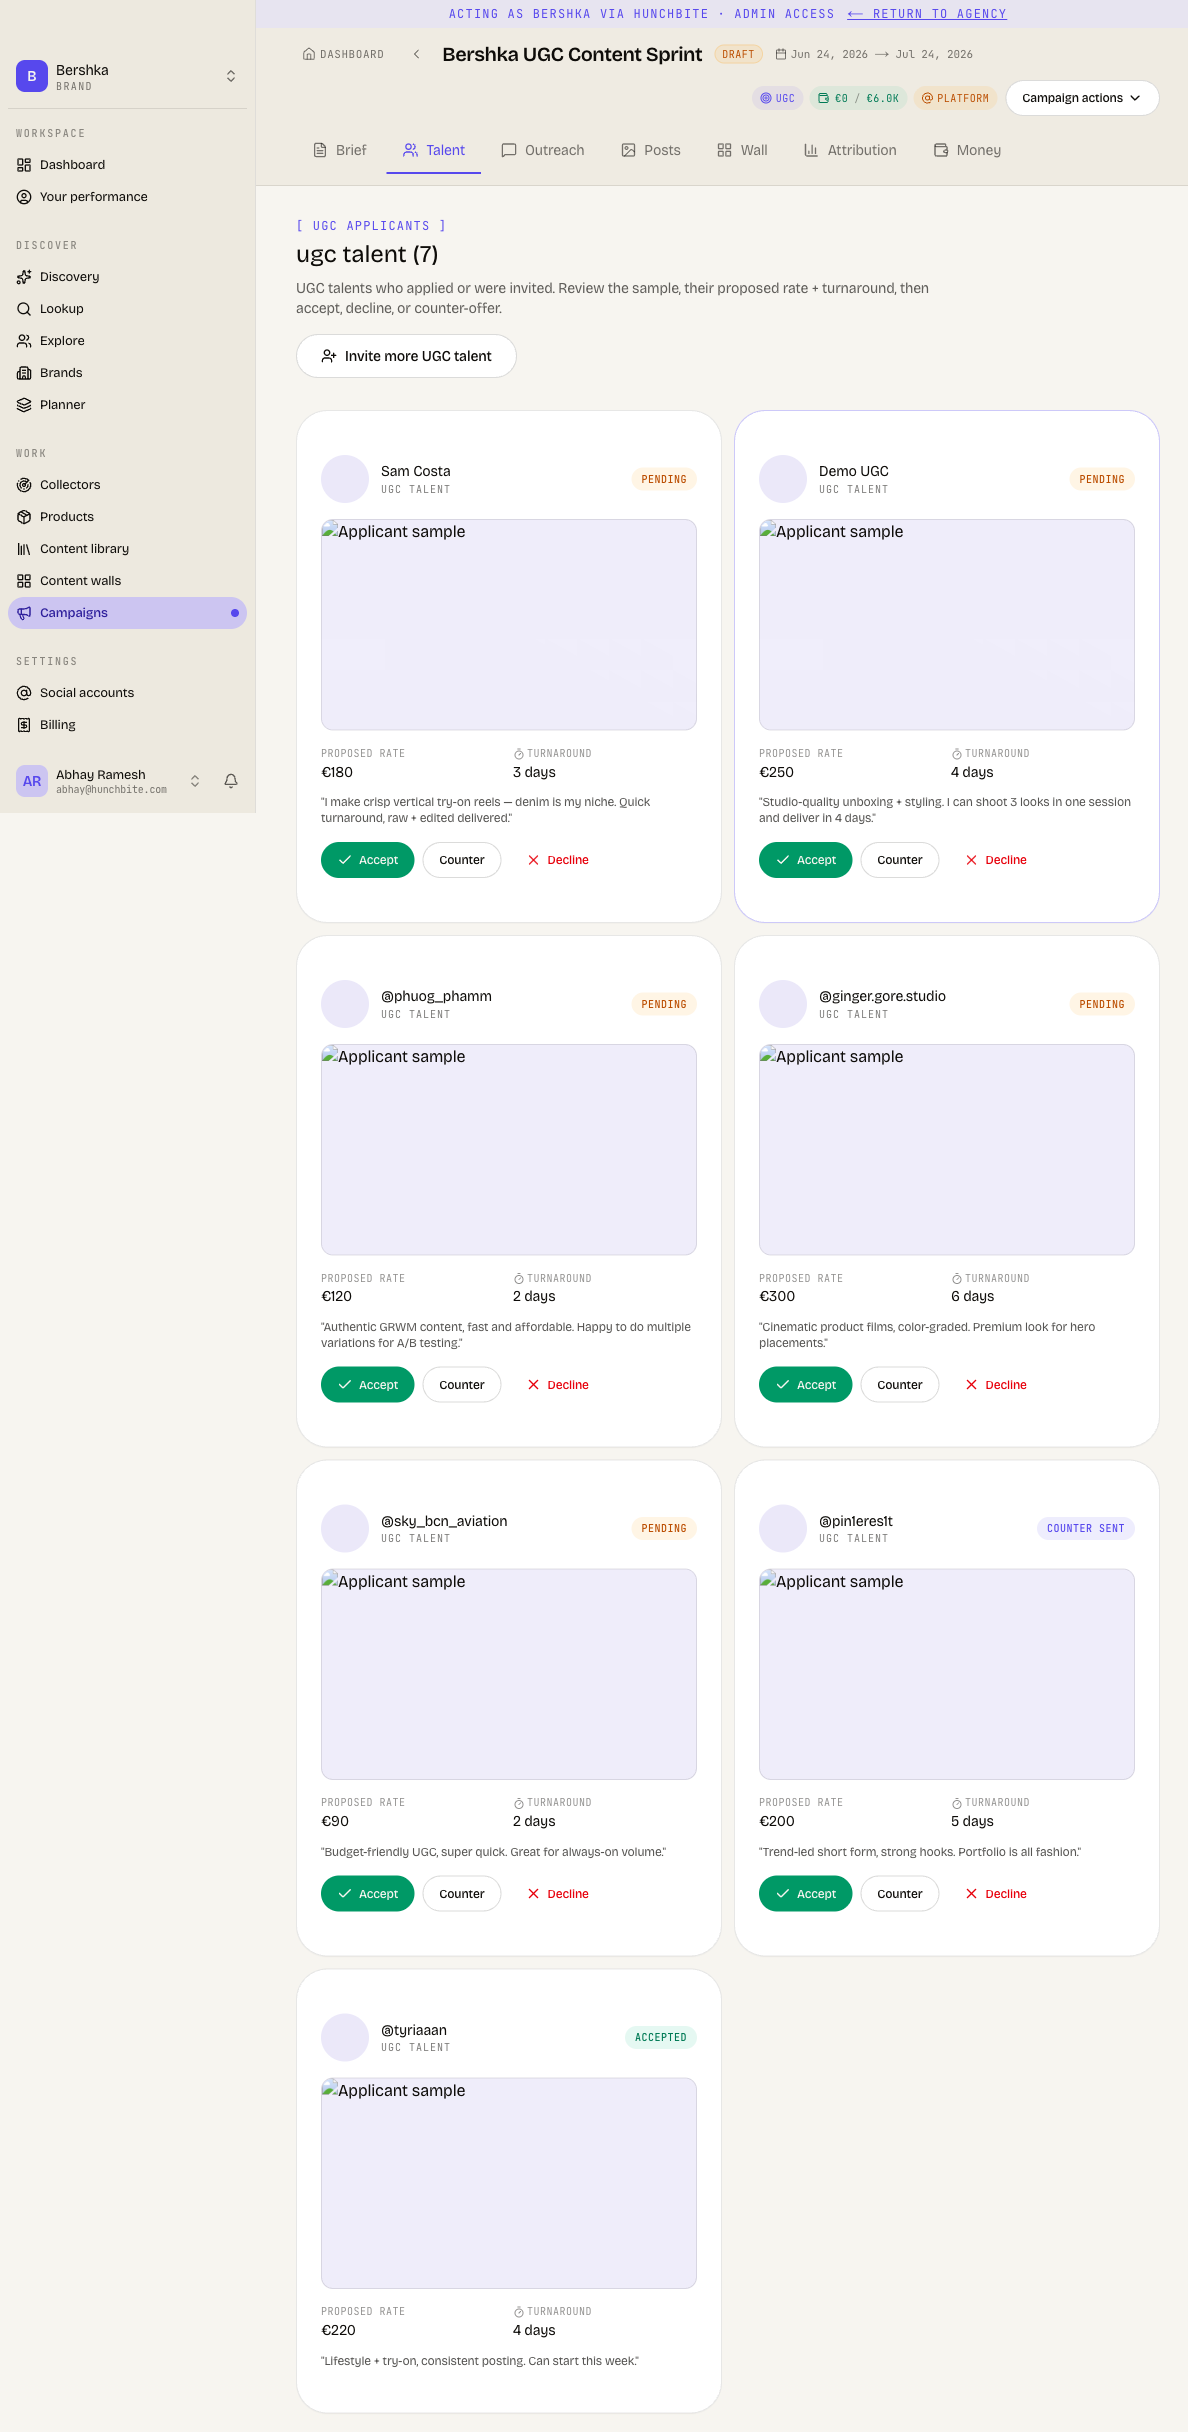
Some campaigns hire UGC talent — independent video and photo creators who deliver content on a fixed-rate gig basis, with no audience required — instead of influencers. On a UGC-only campaign, the Talent tab replaces the standard creator roster with an applicant review view.
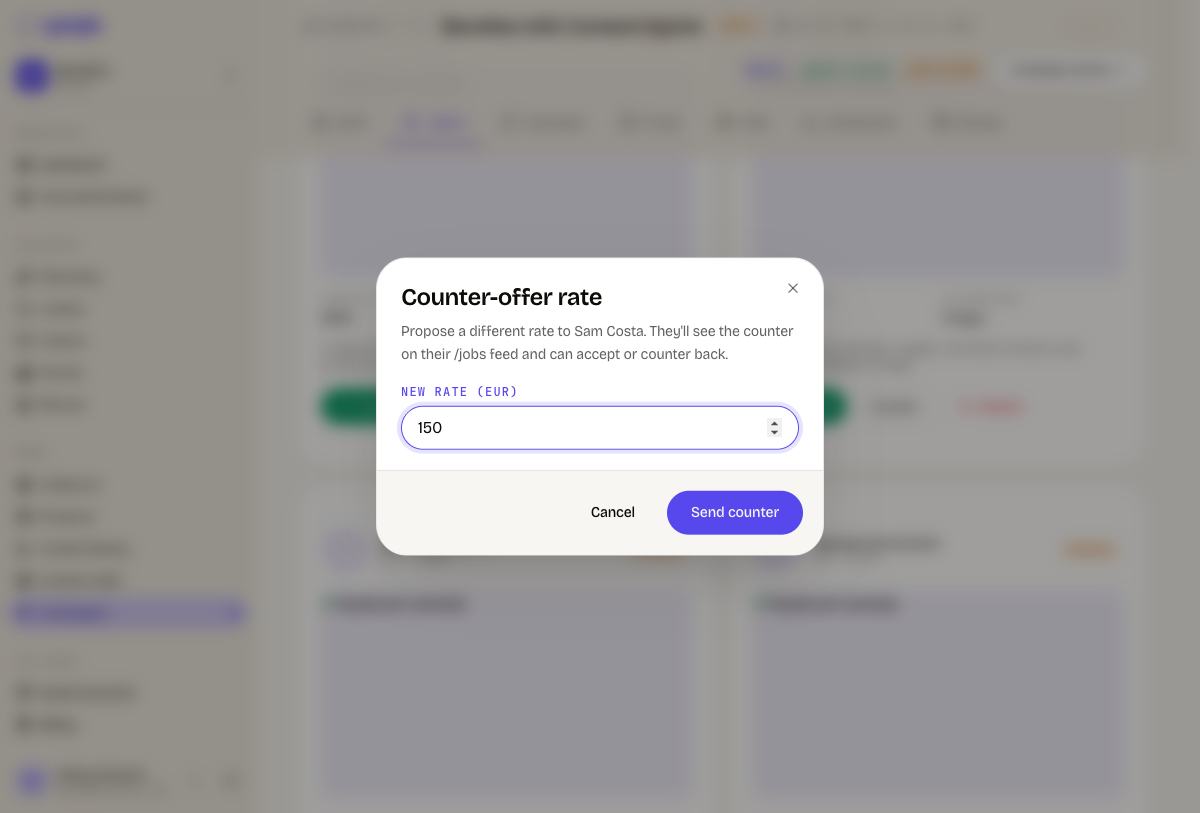
Each applicant card shows the talent's sample, their proposed rate and turnaround, and a short pitch. For each one you can Accept, Decline, or Counter with a different rate. A counter is sent to the talent's Jobs feed, where they can accept it or counter back.
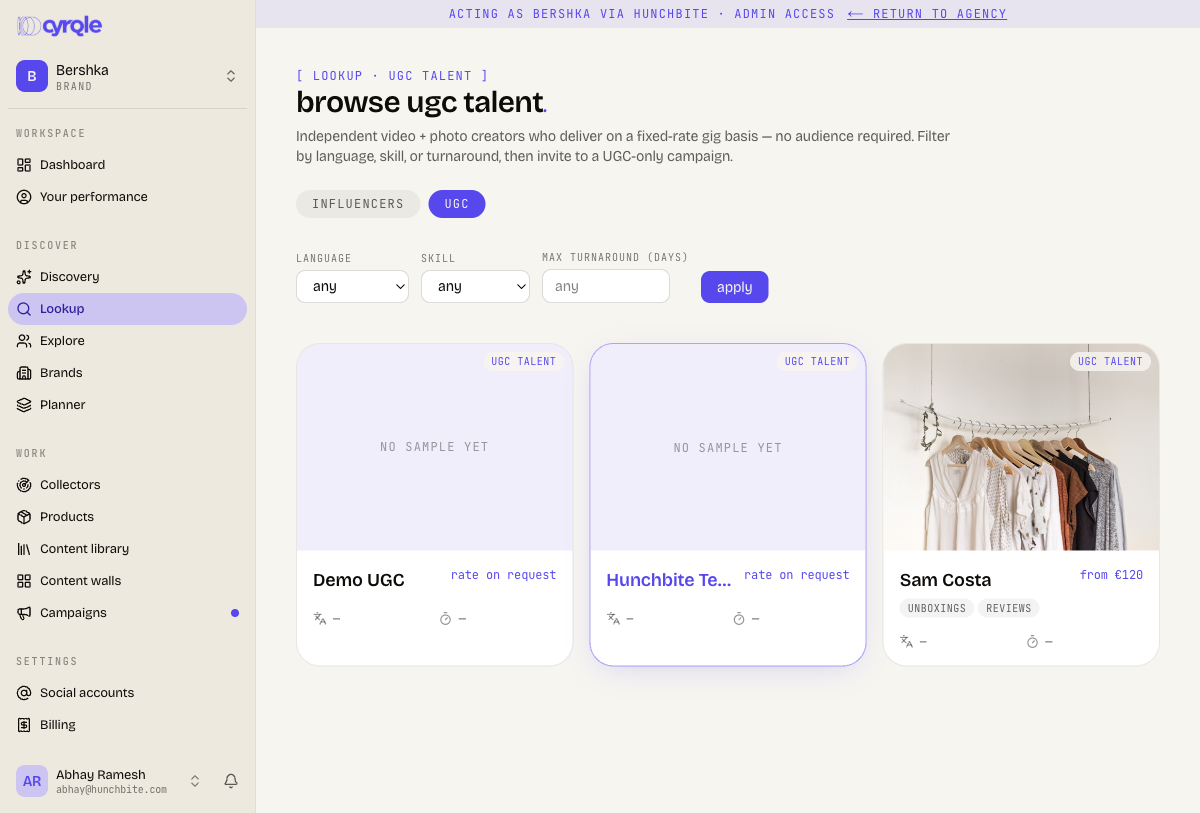
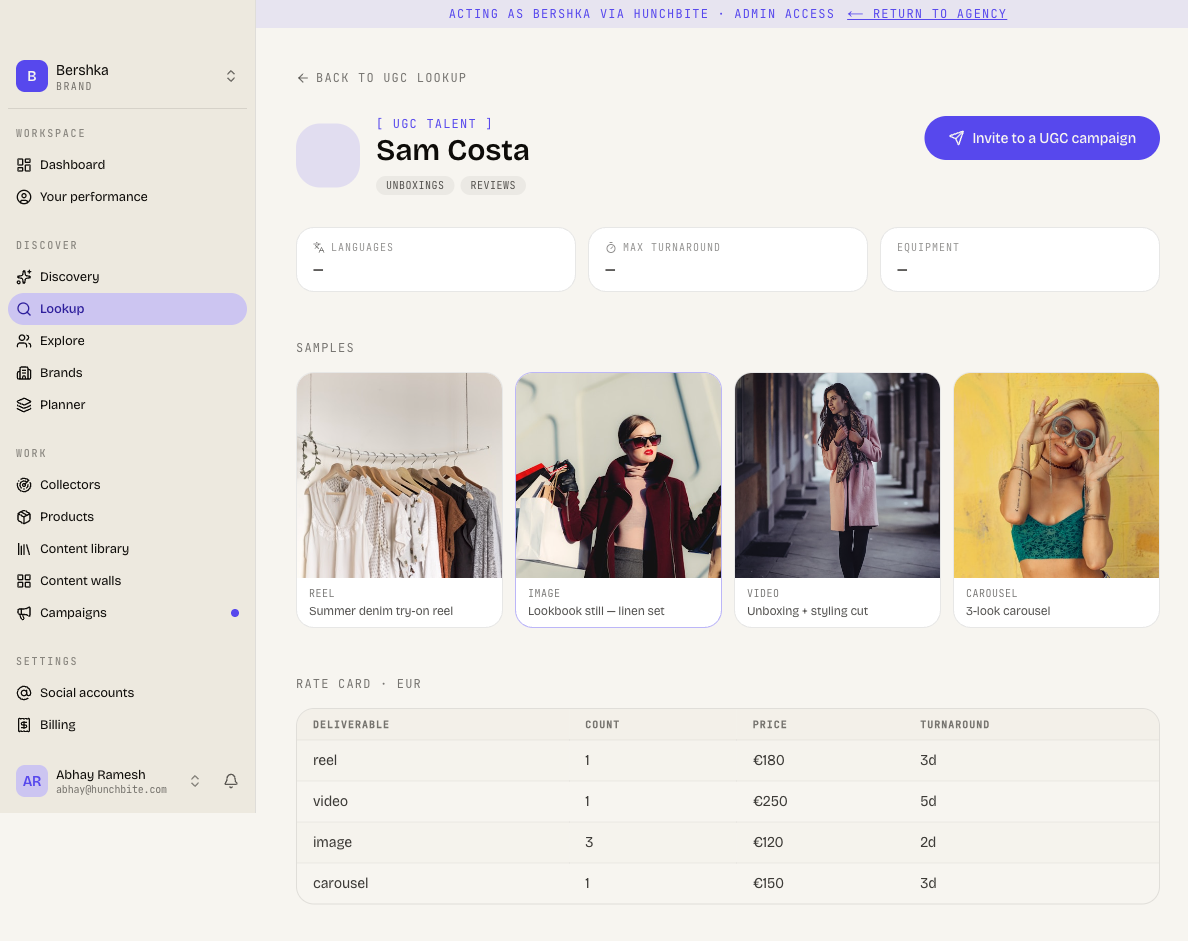
To add more talent, use Invite more UGC talent to browse the UGC directory. Filter by language, skill, or turnaround, and open any talent's profile to review their portfolio samples and rate card before inviting them to the campaign.
Track attribution and pay out
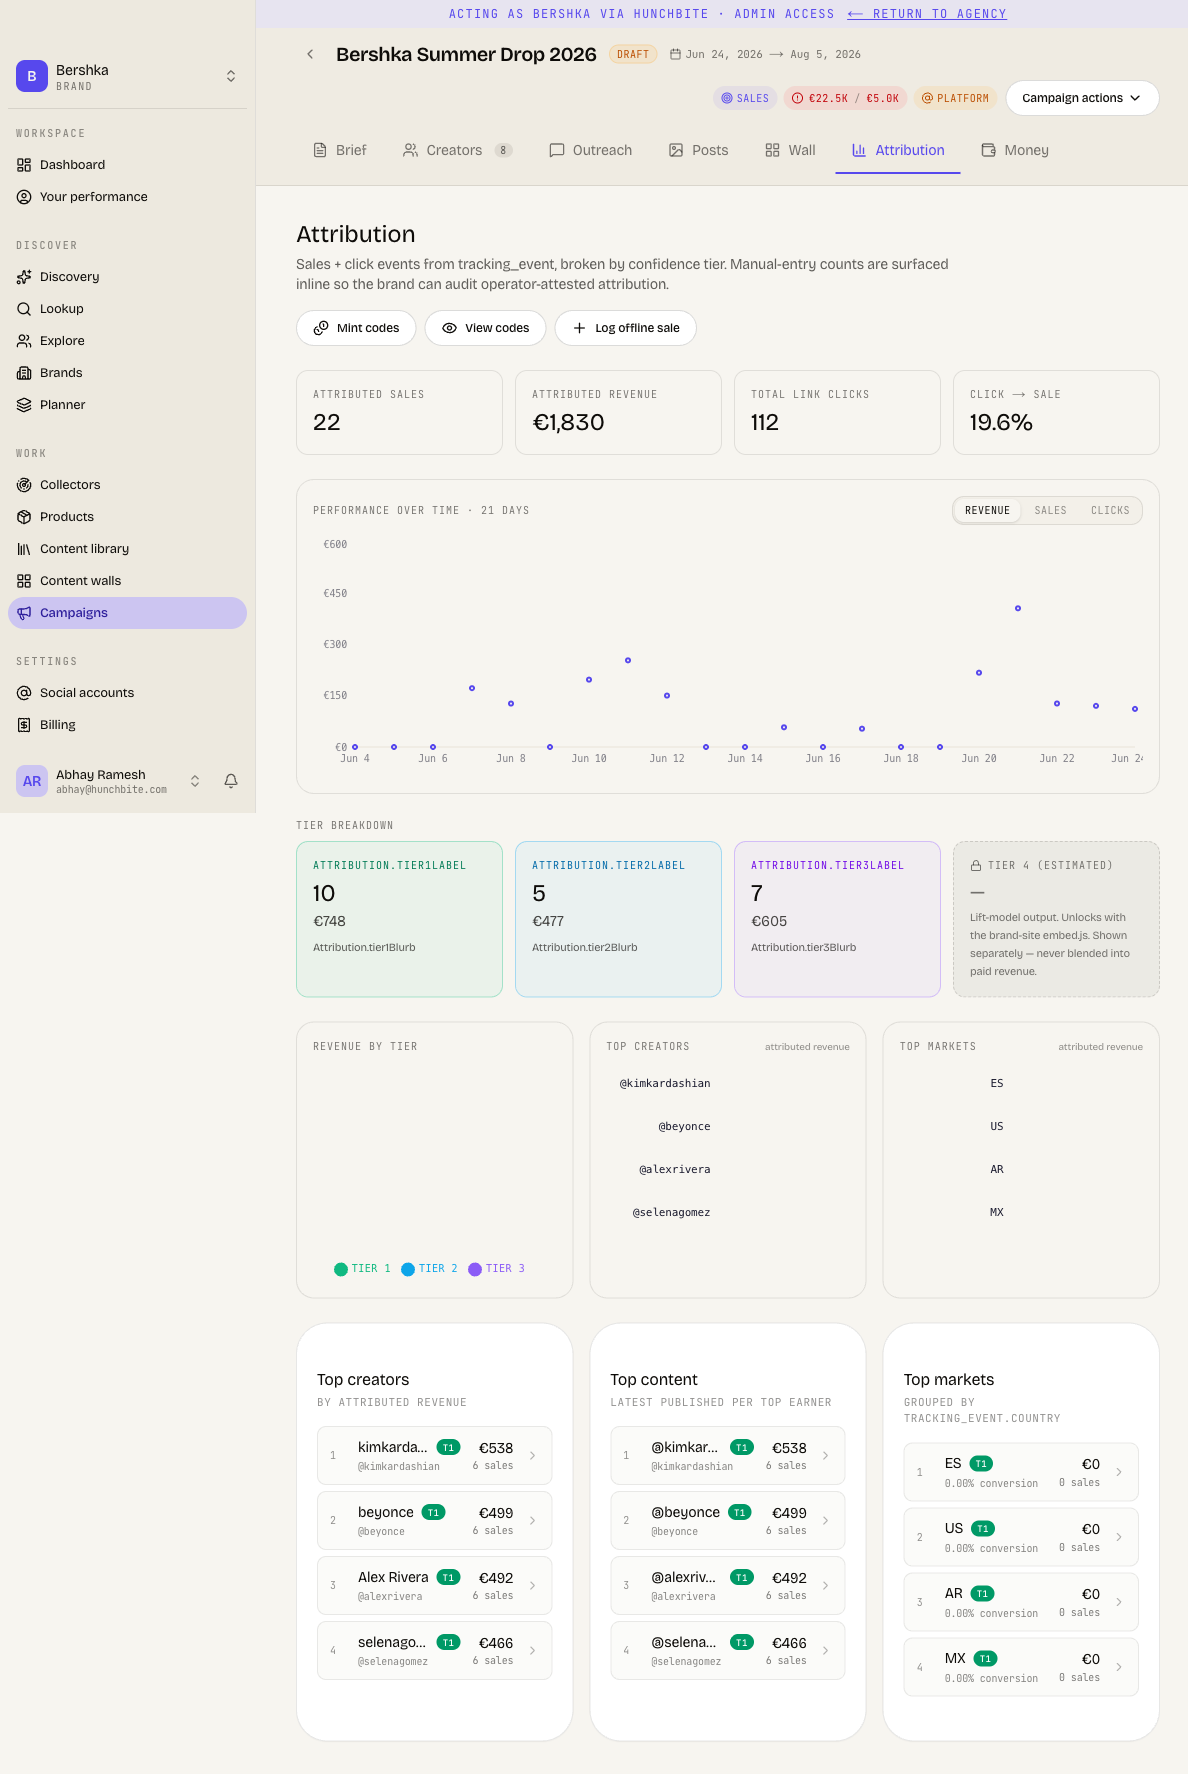
The Attribution tab shows campaign performance: a ROAS headline, a scorecard, confidence-tier breakdowns, and charts. You can enter manual sales, and for offline (Phygital) campaigns you can mint and view QR/promo codes. When the work is done, move the campaign to payouts in flight and settle creators. The mechanics of how creators actually receive money are covered in the payouts guide.
Tips
- You don't need to complete the brief before adding creators — the workspace saves every field as you edit, so you can move between tabs freely.
- Seed the Inspiration & competitors card well: good positive/negative seeds and competitor brands sharpen the cluster Cyrqle returns in Discover.
- Use the Reserved (backup) state for creators you want to keep warm without committing, so you can swap them in if someone drops out.
- Fund the campaign wallet before you reach the payout stage to avoid blocking releases.
- Watch the attention bar — it's the fastest way to see applicants, drafts, and payouts that need action.
- To run a similar campaign again, use a Quick start repeat card on the Campaigns list instead of starting from scratch.