Fan activation
Invite your existing fans to post with your hashtag, review their entries, secure content rights, and publish the best ones to your walls.
Fan activation is the second tab in Campaigns. Instead of matching paid influencers to a brief, a fan-activation campaign invites your own audience — fans and customers — to create content and submit it by posting publicly with your campaign hashtag. Cyrqle picks those posts up, holds them in a review queue, and lets you approve the ones you like. Approved entries grant you content rights (fans accept the terms by entering), so they become a Fan content source you can publish on your Content walls.
This is distinct from the standard Brief campaigns covered in the Campaigns guide: there is no shortlist, no outreach, and no payouts. The "creators" here are your fans, and the value exchange is exposure and being featured, not a contract.
Before you start
- Your workspace must be a brand (or an agency working inside a brand client's workspace).
- Decide on a campaign hashtag (at least two characters) and, optionally, a handle for fans to tag.
- Know your campaign window (start and end date/time) and which markets you are running in. If any market is in the EU, a GDPR clause is added to the terms automatically and cannot be removed.
- You will accept a set of Terms & conditions on behalf of your brand — either Cyrqle's standard template or your own pasted text. Fans accept these by posting.
Open the Fan activation tab
In your workspace, go to Campaigns. At the top you'll see two tabs: Brief and Fan Activation, each with a count. Click Fan Activation to see your fan campaigns as cards. Each card shows the campaign title, its status (draft, live, paused, closed, or cancelled), the hashtag, the campaign window, and the number of entries captured so far.
If you have no fan campaigns yet, you'll see an empty state with a New Fan Activation button.
The purple dot on Campaigns
When one or more fan-activation campaigns have entries waiting for your decision, a small purple dot appears next to Campaigns in the sidebar. It's your cue that the review queue has pending entries.
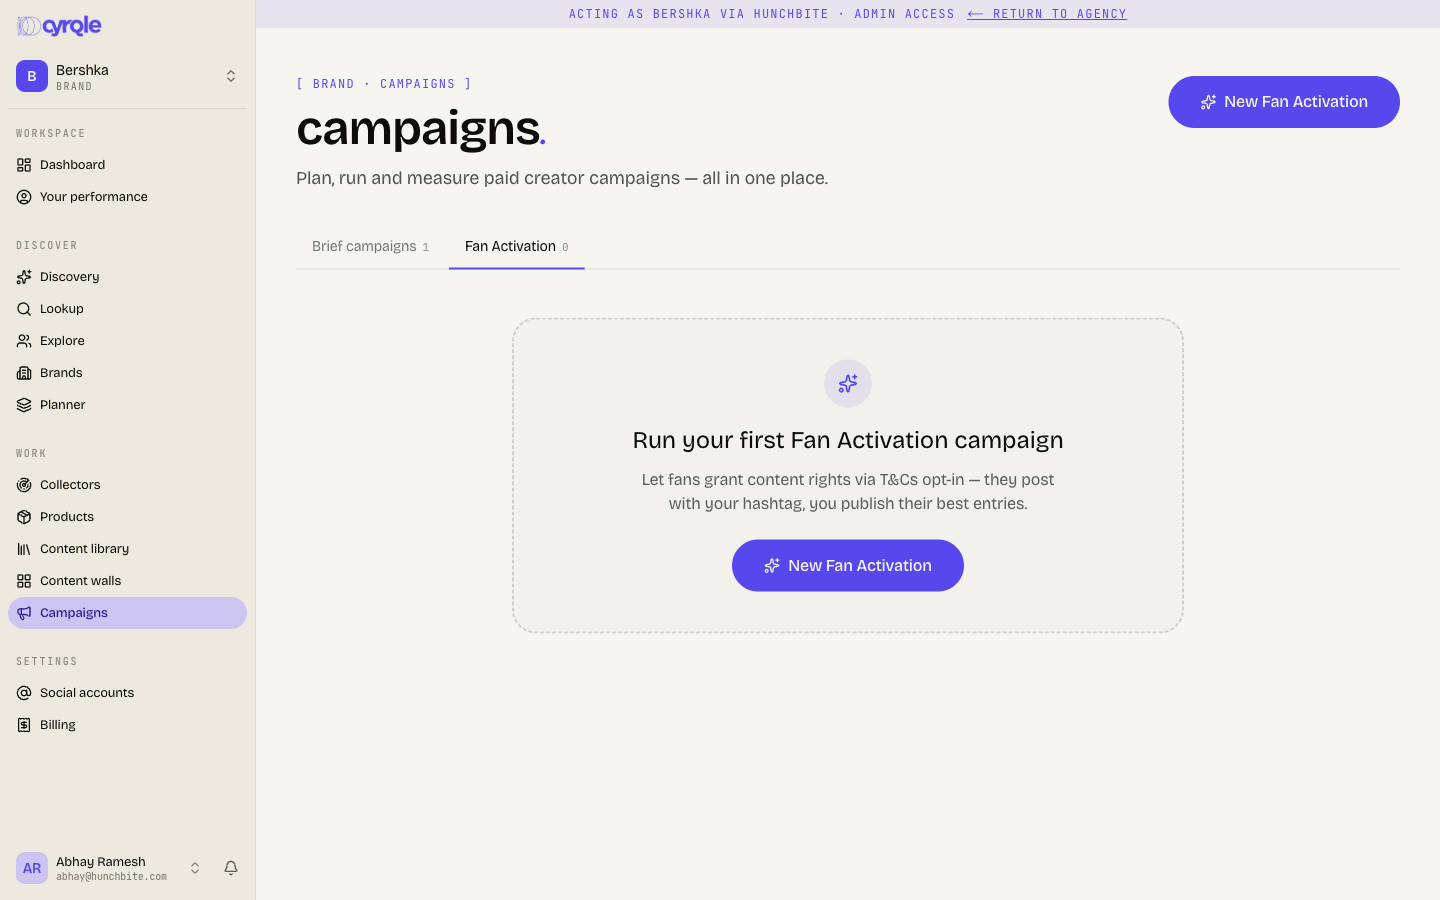
Create a fan-activation campaign
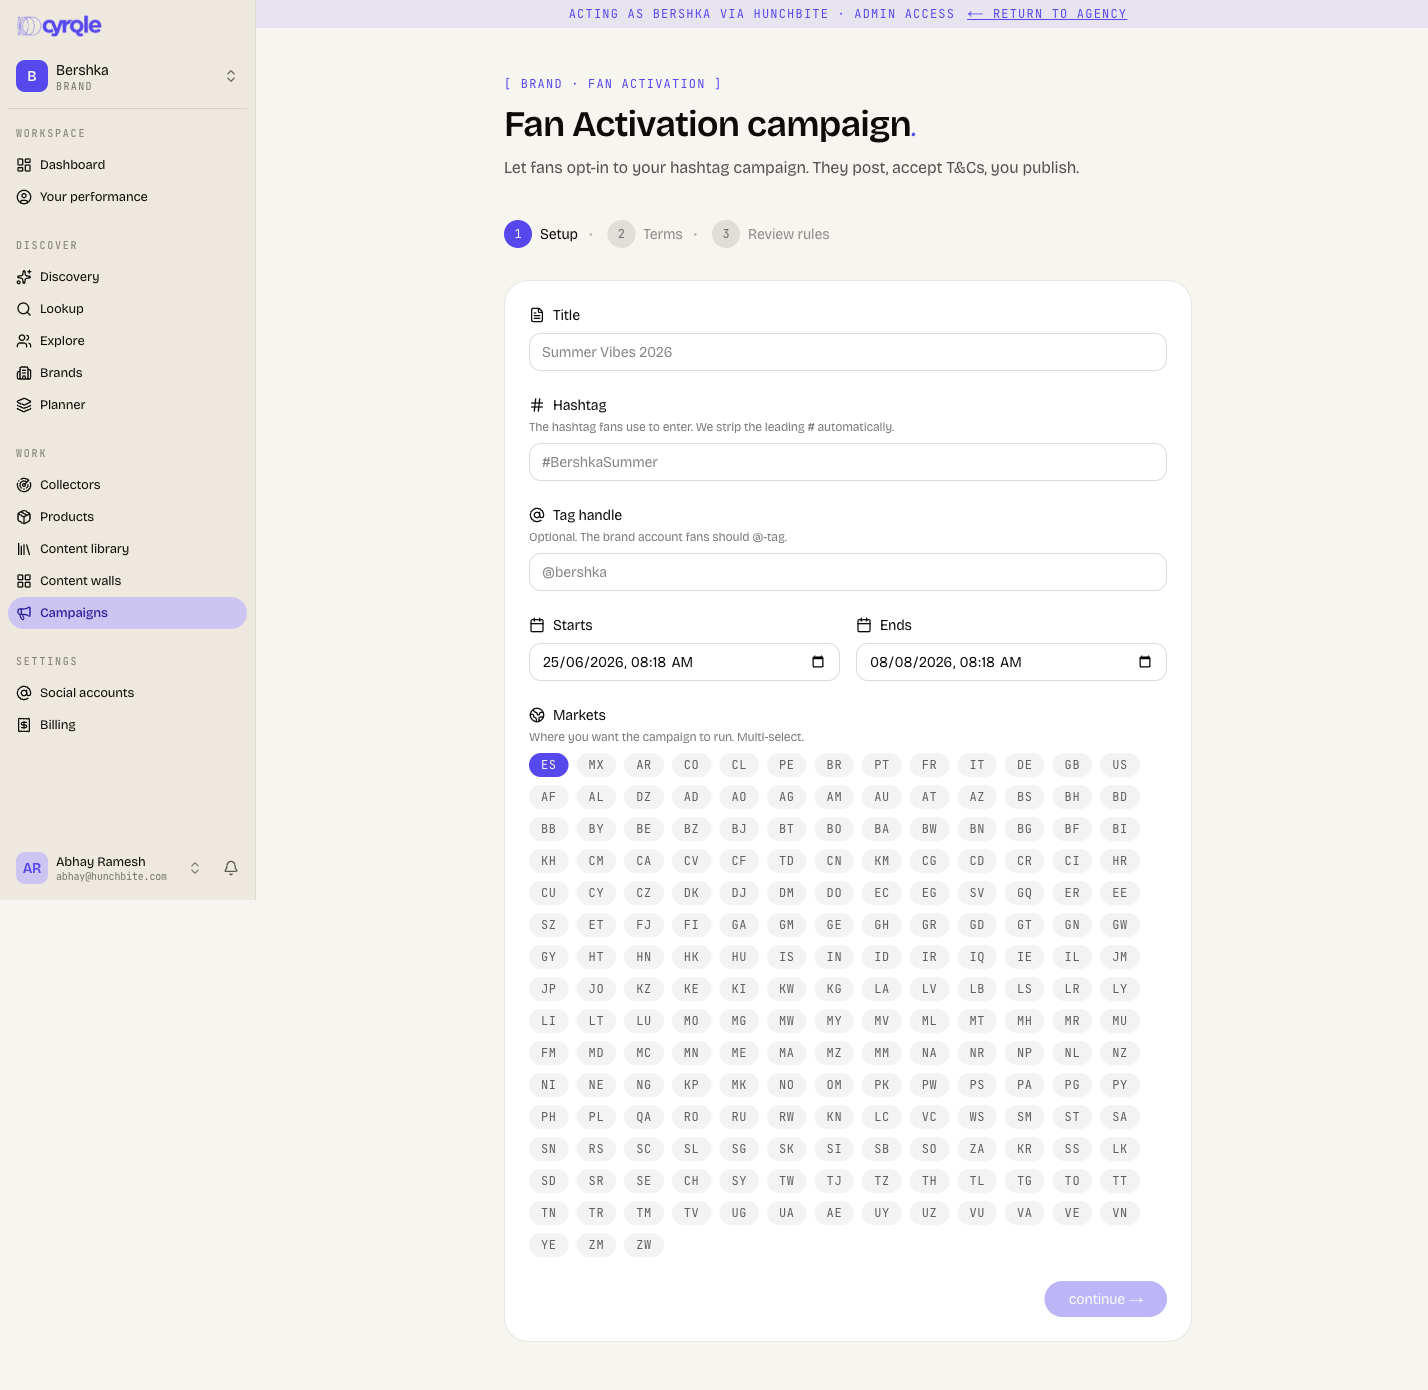
Click New Fan Activation. A three-step wizard walks you through setup, terms, and review rules. Your choices are only saved when you finish the last step, so you can move back and forth freely.
Step 1 — Setup
Fill in the basics:
- Title — the campaign name fans see on the landing page (for example, "Summer Vibes 2026").
- Hashtag — the tag fans must include to enter (for example,
#BershkaSummer). Required, minimum two characters. - Tag handle — an optional account fans should also tag (for example,
@bershka). - Starts / Ends — the campaign window. The end must be after the start.
- Markets — one or more country codes. Adding any EU market locks an EU GDPR clause into your terms.
Click continue when the form is valid.
Step 2 — Terms & conditions
Choose how fans grant you rights:
- Cyrqle standard template (recommended) — a lawyer-baseline template, pre-filled with your brand name, hashtag, dates, and markets. Fans accept it by posting.
- Paste your own — your own terms text. Cyrqle validates it as you type and flags missing standard clauses, with a one-click insert standard clause for common gaps.
Use the rendered text / preview as fan toggle to see exactly what fans will read. You must tick the acceptance checkbox to continue. Note: if you edit any field that changes the terms (even the hashtag or a market), the checkbox resets and you must re-read and re-accept.
Step 3 — Review rules, then start
Pick how entries are handled:
- Manual review (recommended) — every entry waits in the queue until your team approves it.
- Auto-approve — posts go live the moment Cyrqle detects the hashtag and terms acceptance. Faster, but you can't un-publish from social later.
Set Feature top N by engagement — how many of the strongest entries to pin/feature automatically.
Click start campaign to create and publish it. You land on the campaign's detail page.
Share the campaign with your fans
Every fan campaign has a public landing page at a /c/... URL. From the campaign detail page, use View landing page to open it, or copy the public landing URL from the Overview tab.
The landing page is a standalone, no-login page that shows your brand, the campaign title, a live countdown, a "How it works" section (post a photo or reel on Instagram or TikTok, use the hashtag and tag, keep the post public), and a live grid of recent approved/featured entries. Fans don't submit through a form — they simply post publicly with your hashtag, and Cyrqle captures the post.
On the Landing page tab you can pick a theme (default, minimal, or brand), set a brand accent colour, and preview the page in an inline frame before sharing.
How entries are captured
Once a campaign is live, a hashtag listener watches Instagram and TikTok for public posts using your hashtag and pulls them in as entries roughly every ten minutes during the campaign window. You'll find the listener's status (platform, posts ingested, entries created) on the Entries tab, where you can relaunch or stop it.
Entries depend on public posts
Cyrqle can only capture posts that are public. Private accounts won't be picked up — that's why "make your post public" is one of the landing-page steps.
Review and approve entries
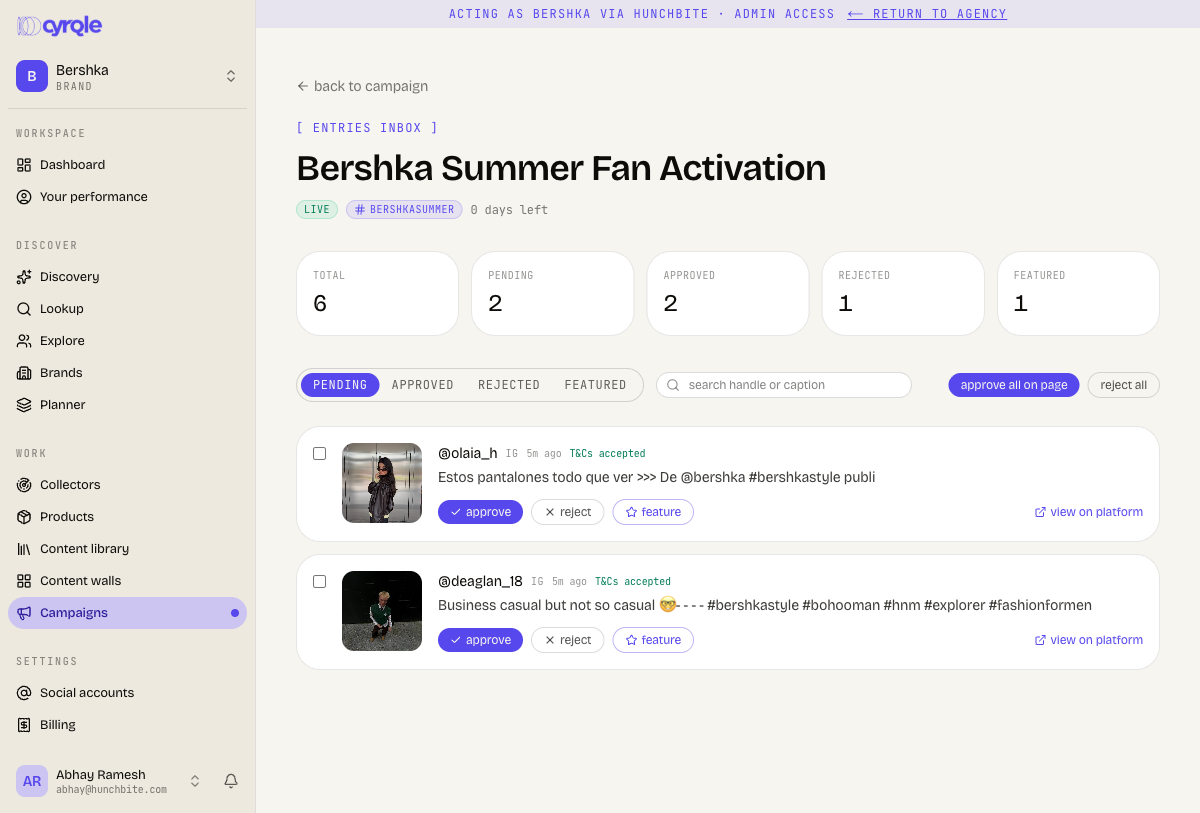
Open the campaign and go to the Entries tab, then Open inbox to reach the review queue. The inbox header shows counts for total, pending, approved, rejected, and featured.
Filter by decision (pending, approved, rejected, featured), by market, or search by handle or caption. Each entry card shows the cover image, the fan's handle, the platform, when it was captured, the market, a "T&Cs accepted" marker, and the caption, with a link to view the original post on the platform.
For each pending entry you can:
- Approve — accept it; rights are now yours and it becomes eligible for your walls.
- Reject — decline it.
- Feature — approve and mark it as a featured/winner candidate (featured entries surface on the landing page and feed winner selection).
To move quickly, use approve all on page or reject all for the entries currently shown.
Rights you get from approved entries
When a fan posts with your hashtag, they accept your campaign's terms, and approving their entry secures the content rights described there. Once a campaign is closed or archived, the detail page confirms the grant: Rights are perpetual — approved entries can be used on any wall, in any market, forever.
The Terms tab keeps an audit trail: which template/brand of terms is in use, who accepted them and when, and a hash of the accepted text. If you later regenerate the terms so the text drifts from what was accepted, Cyrqle flags the mismatch and offers re-accept and republish so your acceptance always matches the live wording.
Close, pick winners, and archive
- Close campaign — stops capturing new entries.
- Pick winners — on a closed or archived campaign, choose winners from your featured/winner pool. Winners surface on the archived landing page.
- Archive — moves the campaign to a permanent, read-only record. The landing page stays reachable at its
/archiveURL.
Publish approved fan content to a Content wall
Approved fan entries flow into Content walls as the Fan content consent source. When you create or edit a wall, the Source step offers three consent sources you can combine:
- Creator content (creator contracts)
- UGC rights (collectors)
- Fan Activation Campaign — "Hashtag campaigns with T&Cs opt-in", measured in entries
Tick Fan Activation Campaign to include approved fan entries. You can include all fan campaigns or narrow to specific ones, and the step shows a live total includable count. If you have no fan campaigns yet, the card links you straight to start a new Fan Activation campaign. Once published, this fan content appears on the wall and is counted in that wall's analytics alongside your other sources.
See Content walls & collectors for publishing, embedding, and wall analytics.
Tips
- Keep manual review on for your first campaign. Auto-approve is fast, but you can't pull a post back off social once it's live.
- Re-read the terms after any edit. Changing the hashtag, dates, or markets re-renders the terms and clears your acceptance on purpose.
- EU markets add a GDPR clause automatically — it's locked on and can't be removed.
- Feature your strongest entries so they pin to the landing page and seed your winner pool.
- Watch the purple dot next to Campaigns — it means entries are waiting for a decision.