Content walls & collectors
Build a Cyrqle-hosted wall of creator content that links back to your store, fill it from saved Instagram and TikTok searches, and track what it drives.
A content wall is a Cyrqle-hosted page of creator content that you embed on your own site. It showcases posts you have the rights to use, links each one back to your store, and carries attribution so the creator who drove a click or sale gets the credit. A collector is a saved Instagram or TikTok search that continuously surfaces matching posts into your queue; once you have rights to those posts, the collector becomes one of the sources that fills a wall.
In short: collectors find the content, you clear the rights, and a wall publishes it.
Before you start
- A wall needs content it is allowed to show. That content comes from one or more consent sources: posts from creator contracts (campaign deliverables), posts you hold UGC rights to (sourced via collectors), or fan-campaign entries. If you have none yet, start a campaign or a collector first.
- Collectors spend credits when they run. Your workspace credit balance and month-to-date usage are shown at the top of the Collectors page; a "live" data source costs more per run than "db".
- To embed a finished wall on your website you (or your developer) need to be able to paste a small
<script>snippet into the site's HTML.
Create a collector to source content
Collectors live under Collectors in your workspace. A collector is a folder; inside it you add one or more sources (individual saved searches).
Click New collector, give it a name (for example "Clean beauty UGC"), and click Create collector. This creates an empty collector.
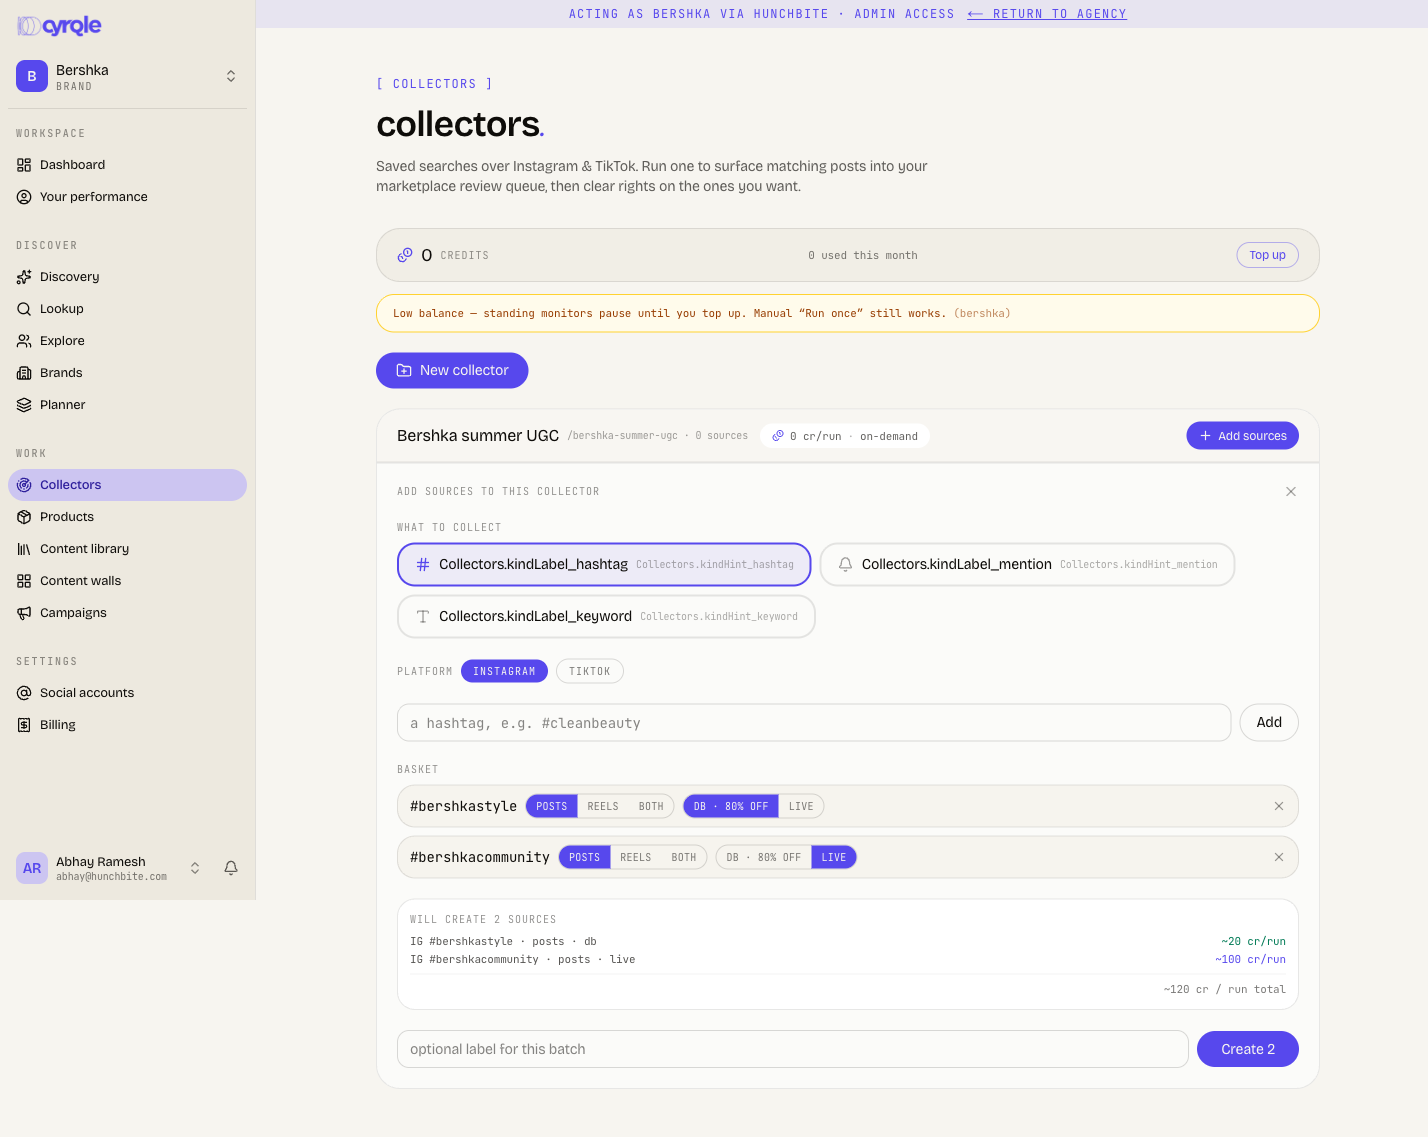
On the collector's card, click Add sources to open the basket.
Choose what to collect: Hashtag, Mention, or Keyword. Pick the platform (Instagram or TikTok), type a term, and press Add. As you type a hashtag or mention, Cyrqle suggests related terms you can tap to add.
For each line in the basket, choose Posts, Reels, or Both, and a data source of db (cheaper, from Cyrqle's index) or live (a fresh pull). The review panel shows how many sources you will create and the estimated credits per run.
Click Create to save the sources into the collector.
Turn surfaced posts into wall-ready content
A collector surfaces posts into your queue, but you can only put a post on a wall once you hold the rights to it.
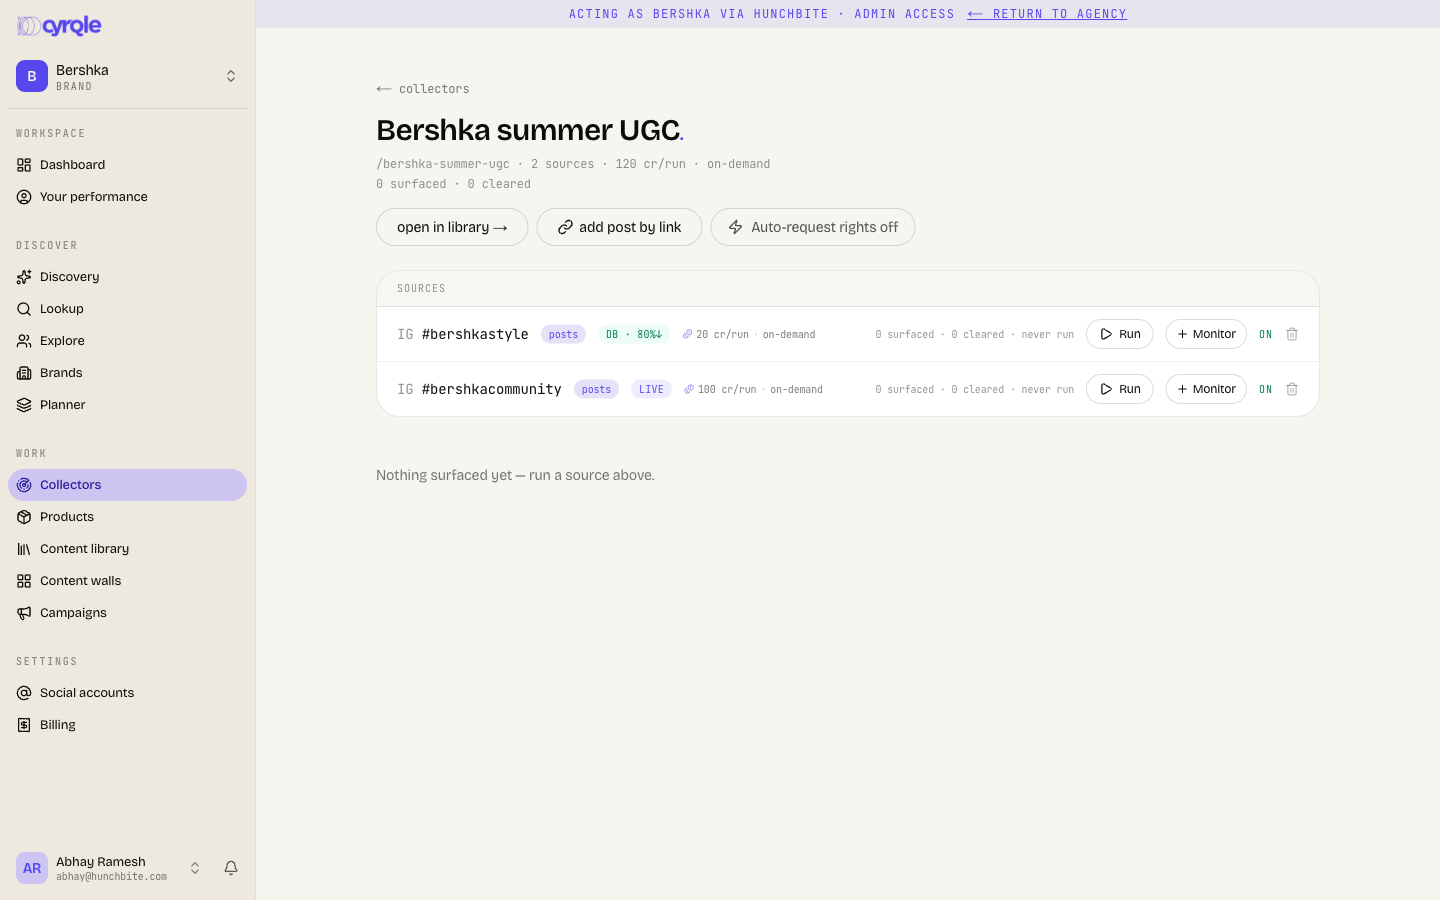
- Open a collector to see its surfaced content across all its sources. Use the source dropdown to narrow to a single search.
- Use Review to triage posts and request rights from creators, or turn on Auto-request rights so every new post the collector finds automatically asks the creator for permission.
- You can also pull in a single post you already know about with Add post by link.
Once a creator clears rights, that post counts toward the UGC rights source and becomes available to any wall.
Create a content wall
Walls live under Content walls. Creating one is a five-step flow; the right-hand pane shows a live preview that updates as you go.
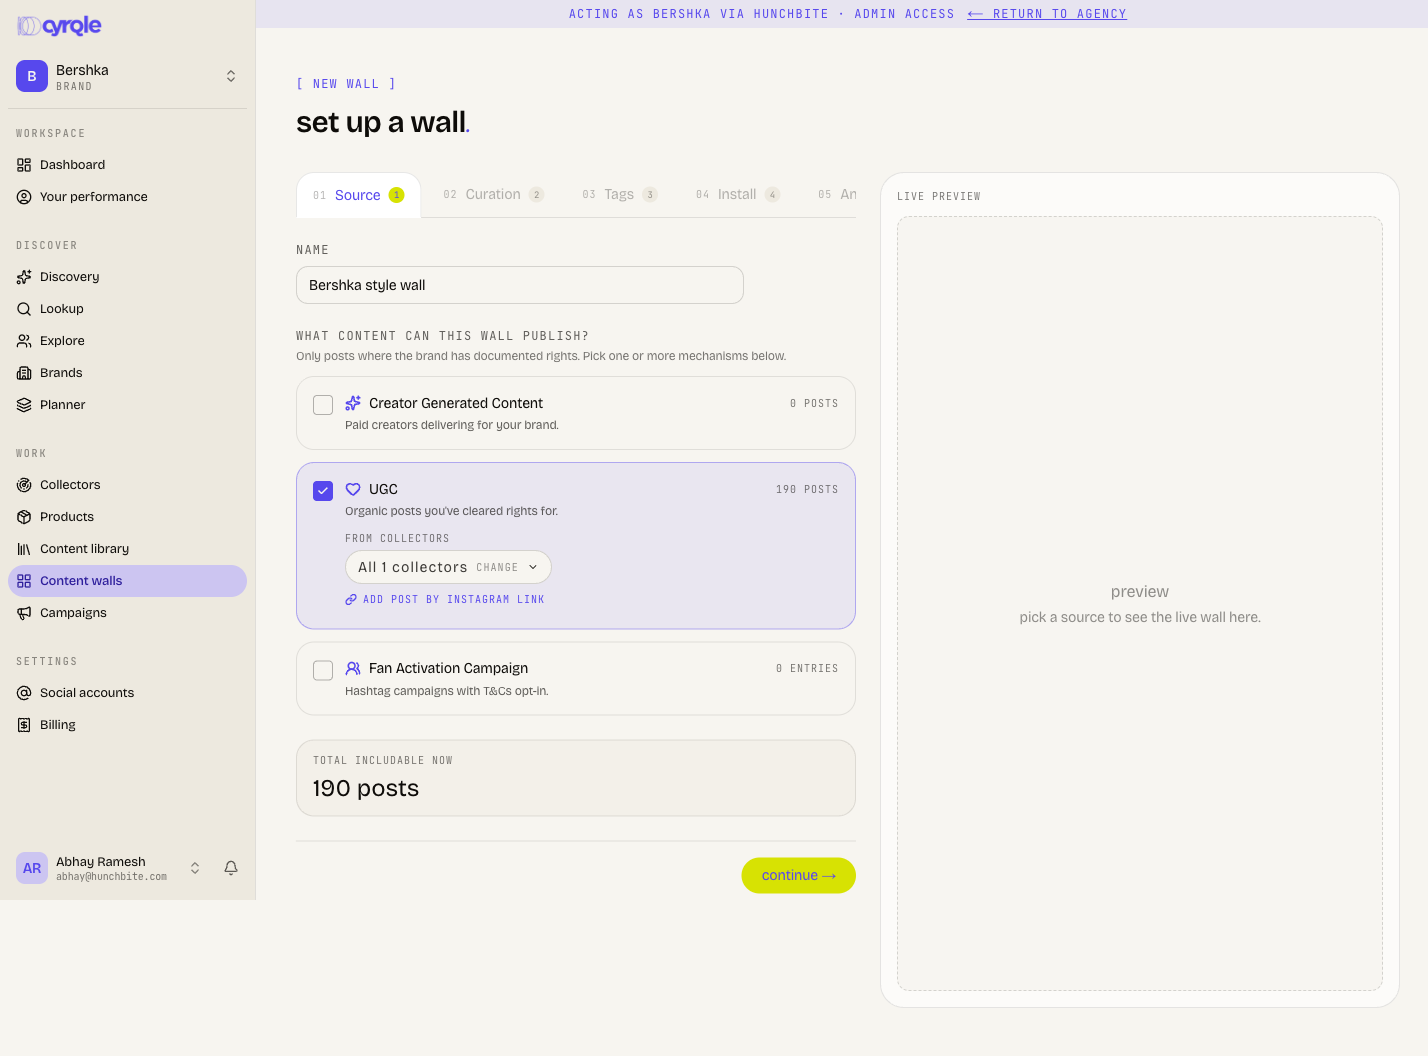
Click New wall. On the Source step, give the wall a name.
Tick one or more consent sources for the content this wall may show: Creator content (campaign deliverables), UGC rights (posts cleared via your collectors), and Fan content (fan-campaign entries). Each card shows how many posts are available.
Optionally narrow a source: for Creator content and Fan content pick specific campaigns, and for UGC rights pick specific collectors. Leaving a source unnarrowed includes everything in it. The Total includable count updates as you choose.
Click Continue. The wall is saved as a draft and the remaining steps unlock.
Curate which posts appear
On the Curation step you see every post in your wall's scope. Each post has three actions:
- Pin — always shown first on the wall.
- Highlight — rendered larger in bento layouts.
- Hide — never published (your ban list).
Click an action again to return the post to default. Use the filter chips (Active, All, Untagged, Ban list) to focus, and Bulk select to act on many posts at once. You can also tag posts with products here (see below). Posts carried in from a fan campaign show a small fan chip.

Tag products and add filter chips
Two kinds of tagging make a wall shoppable and browsable:
- Product tags — on a post card, click the tag button to open the drawer, search your catalogue, and attach a product. You can place a numbered hotspot directly on the image so shoppers can click straight through to that product.
- Tag chips — on the Tags step, build a library of labels (for example "Festival", "Outdoors"), apply them to posts, then use the eye toggle to choose which labels appear as filter chips on the public wall.

Configure how the wall looks and embed it
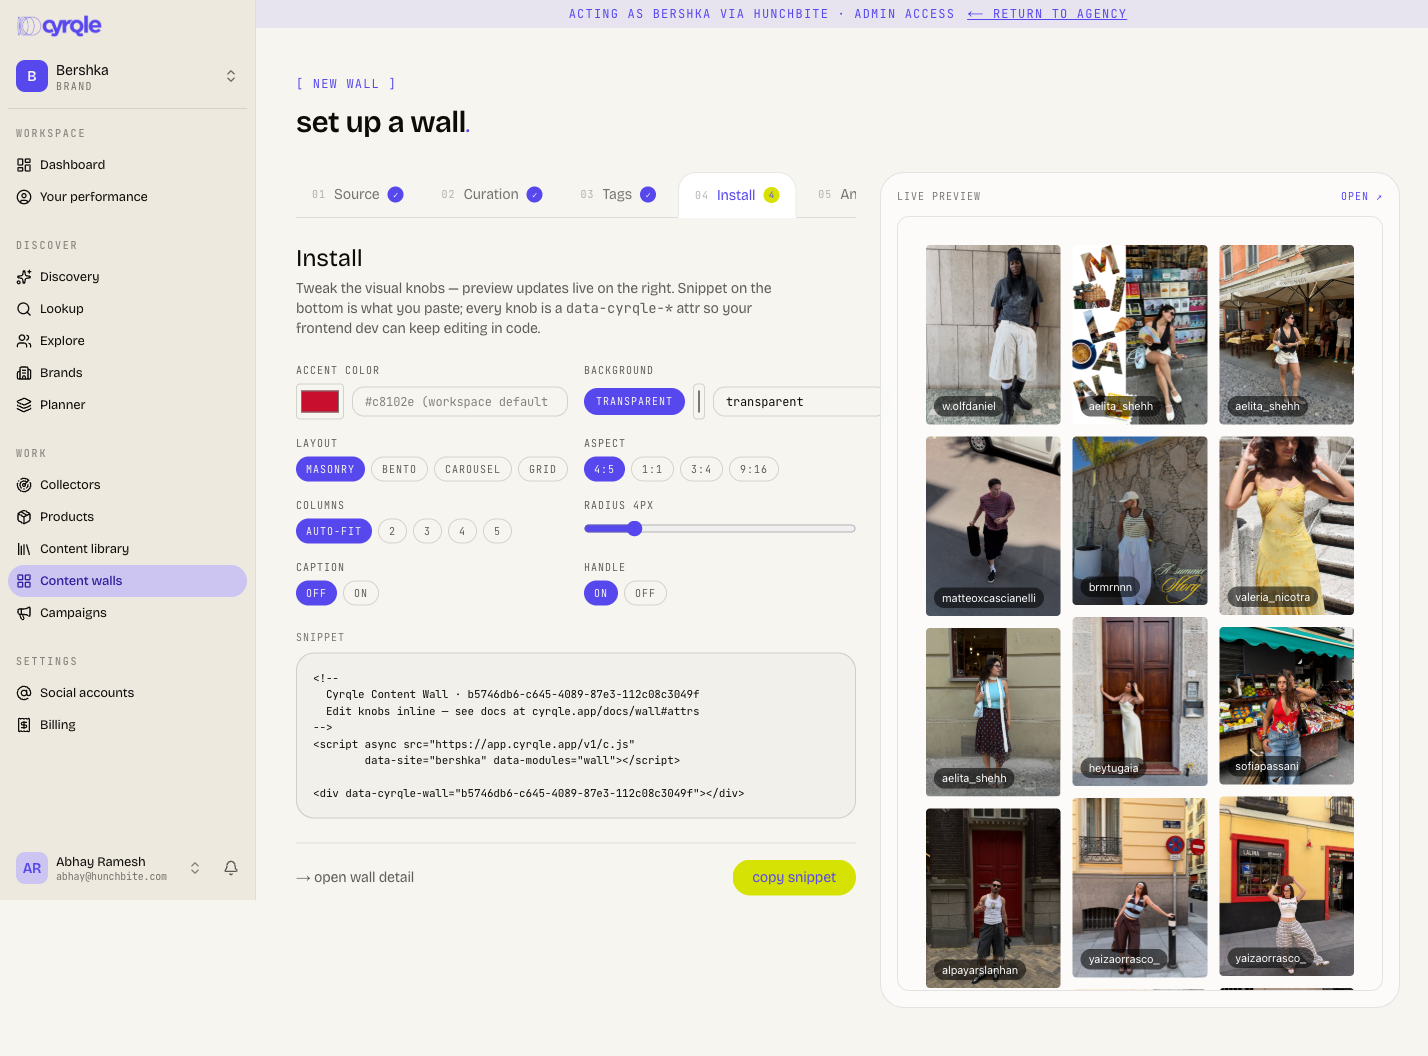
On the Install step, use the visual knobs to set the wall's look: accent colour, background, layout (masonry, bento, carousel, or grid), aspect ratio, columns, corner radius, and whether captions and creator handles show. The preview updates live.
When you are happy, click copy snippet and paste it into your website's HTML. The snippet is a single <script> plus a <div>; every visual setting is a data-cyrqle-* attribute your developer can keep editing in code. Once the snippet is on a page you have set up as a tracked site, the wall renders live and attribution starts flowing.
How embedding and attribution work
The snippet loads Cyrqle's lightweight wall script, which fetches your wall and records views, clicks, and outbound clicks. Crediting those clicks and any resulting sales back to the right creator is handled by attribution on your tracked site configuration. That setup is covered separately — see the attribution guide.
See what your wall is driving
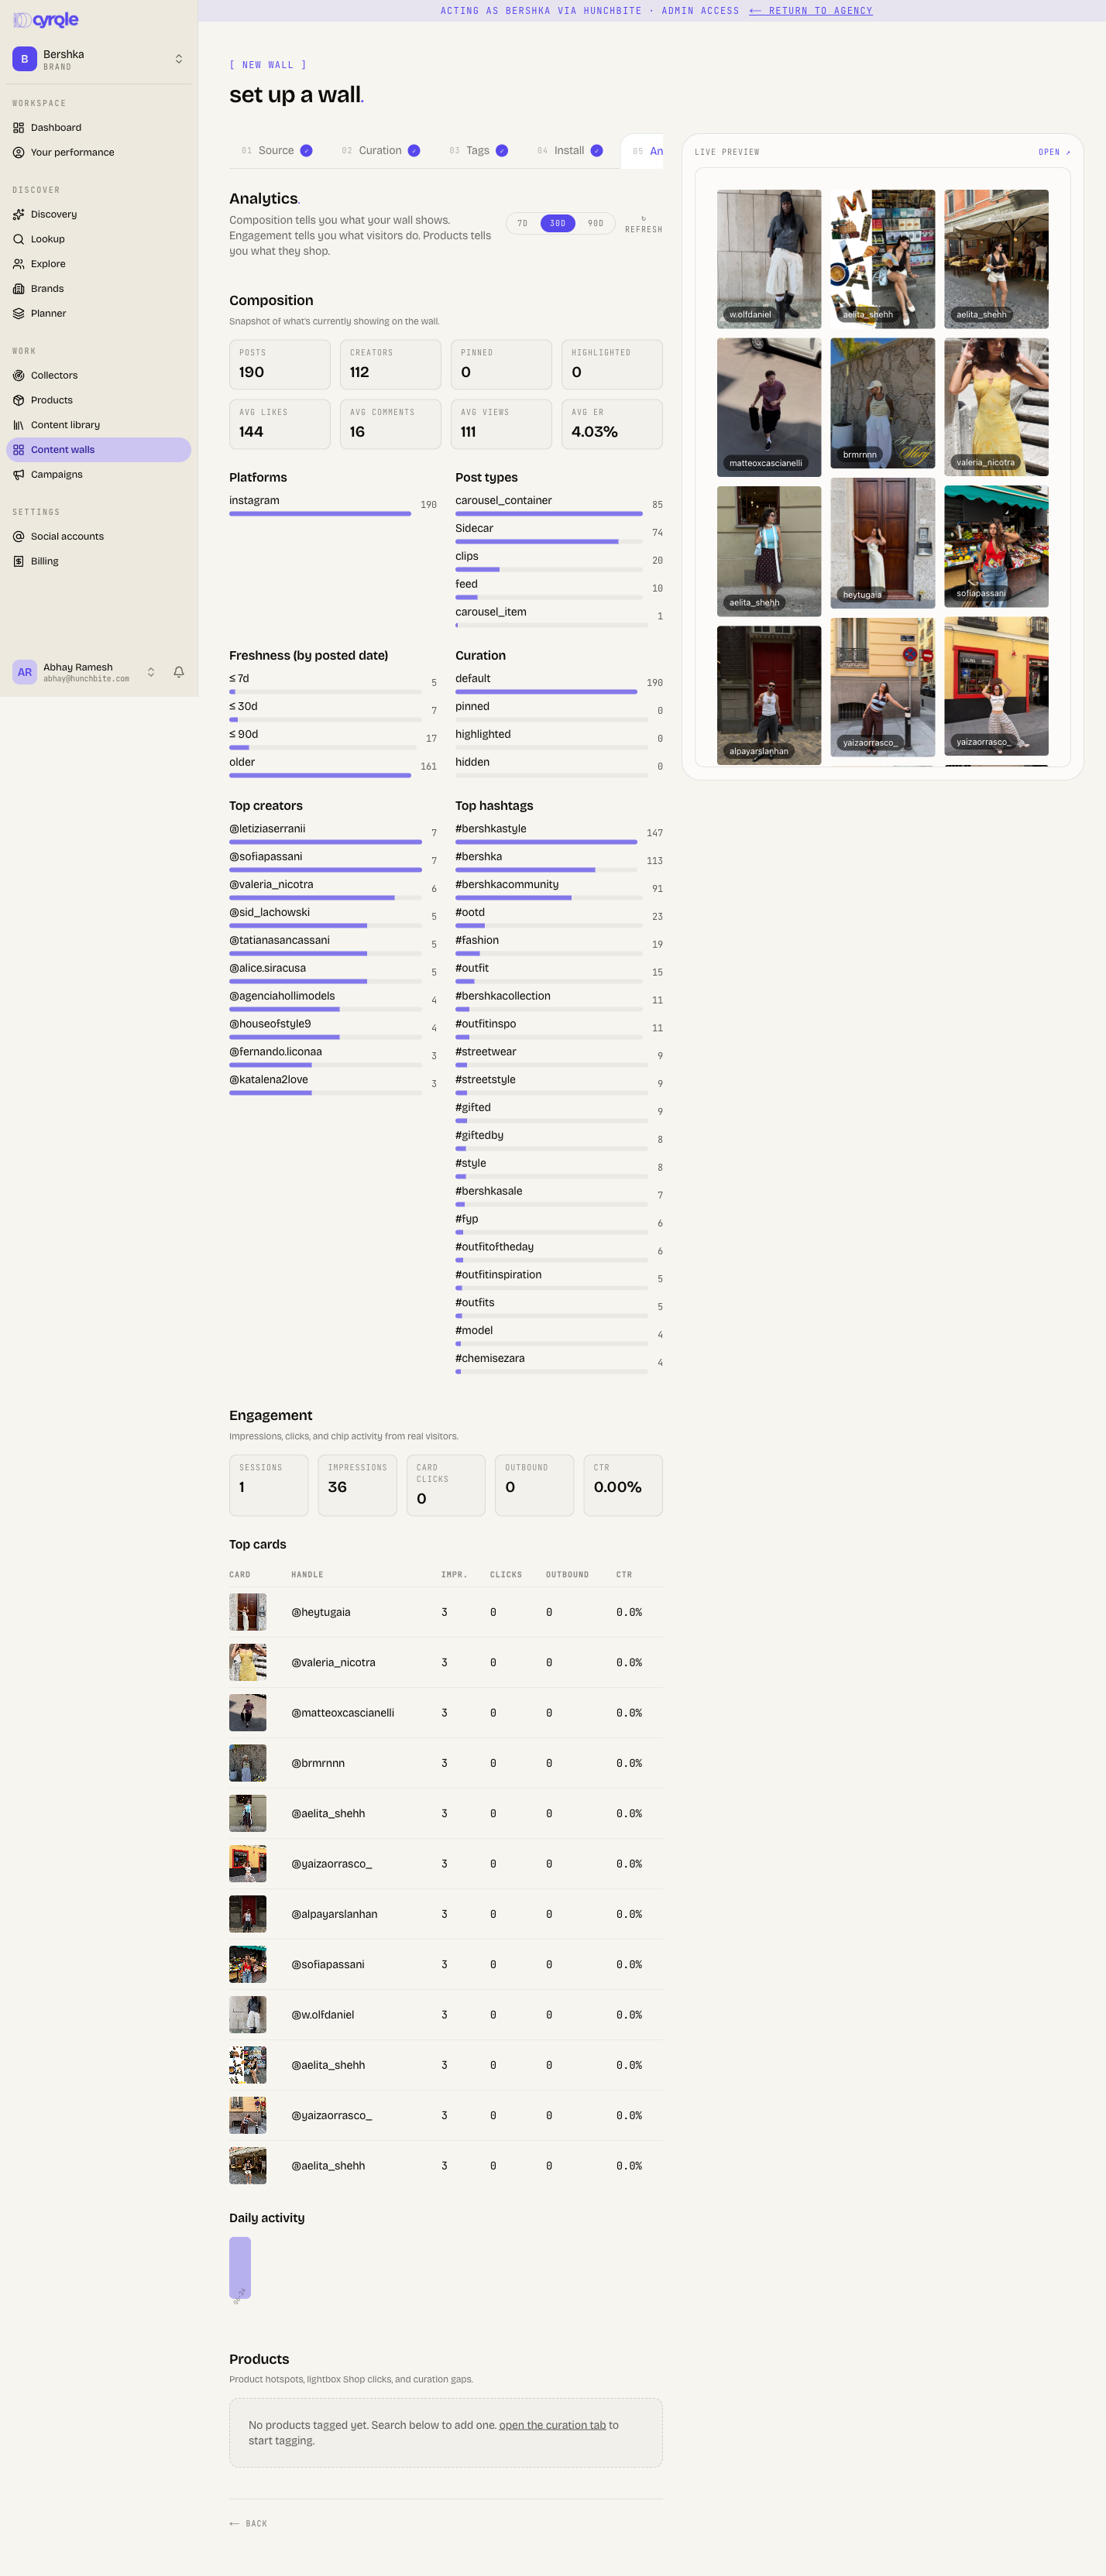
The Analytics step has four reports, with a 7-day / 30-day / 90-day range toggle:
- Composition — what is on the wall right now: post and creator counts, average engagement, platform and freshness breakdowns, top creators and hashtags.
- Engagement — traffic from your embed: sessions, impressions, card clicks, outbound clicks, click-through rate, your top-performing cards, daily activity, and geography. If no events have landed yet, it points you back to the Install step.
- Products — how tagged products perform: coverage, shop clicks, and your top products, plus popular posts that are not yet tagged.
- Fan activation campaigns — the contribution of each fan campaign feeding the wall.
Tips
- Open any existing wall from the Content walls list to edit it; every step is reachable independently and saves on its own.
- Walls start as a draft. Re-using the same snippet across pages reuses the same wall, so changes you make in the workspace appear everywhere it is embedded.
- Prefer db sources on collectors to keep credit spend low; switch a source to live only when you need the freshest pull.
- Use Auto-request rights on a collector so new finds keep clearing rights without manual effort, steadily growing the pool a wall can draw from.
- Leave a consent source unnarrowed to let the wall automatically include new cleared content as it arrives.