Joining a campaign
Find a brief, review and negotiate the offer, sign the agreement, then post and get your work confirmed.
A campaign trip on Cyrqle runs end to end without ever leaving your workspace: you find a brief you fit, accept it (or negotiate the terms first), sign a short agreement, produce your content, post it with the required hashtag, and Cyrqle confirms delivery for you. This page walks the whole path so you always know exactly what to do next.
Before you start
You need a creator workspace and at least one connected social account. Cyrqle matches you to briefs using your niche, location, and audience data, and it needs a verified platform to detect your posts later. If you see "Connect a social platform on your profile first" when you try to apply, open Profile and connect a channel, then come back. Completing your audience survey (Profile → Edit → Audience) sharpens your matches.
Browse opportunities
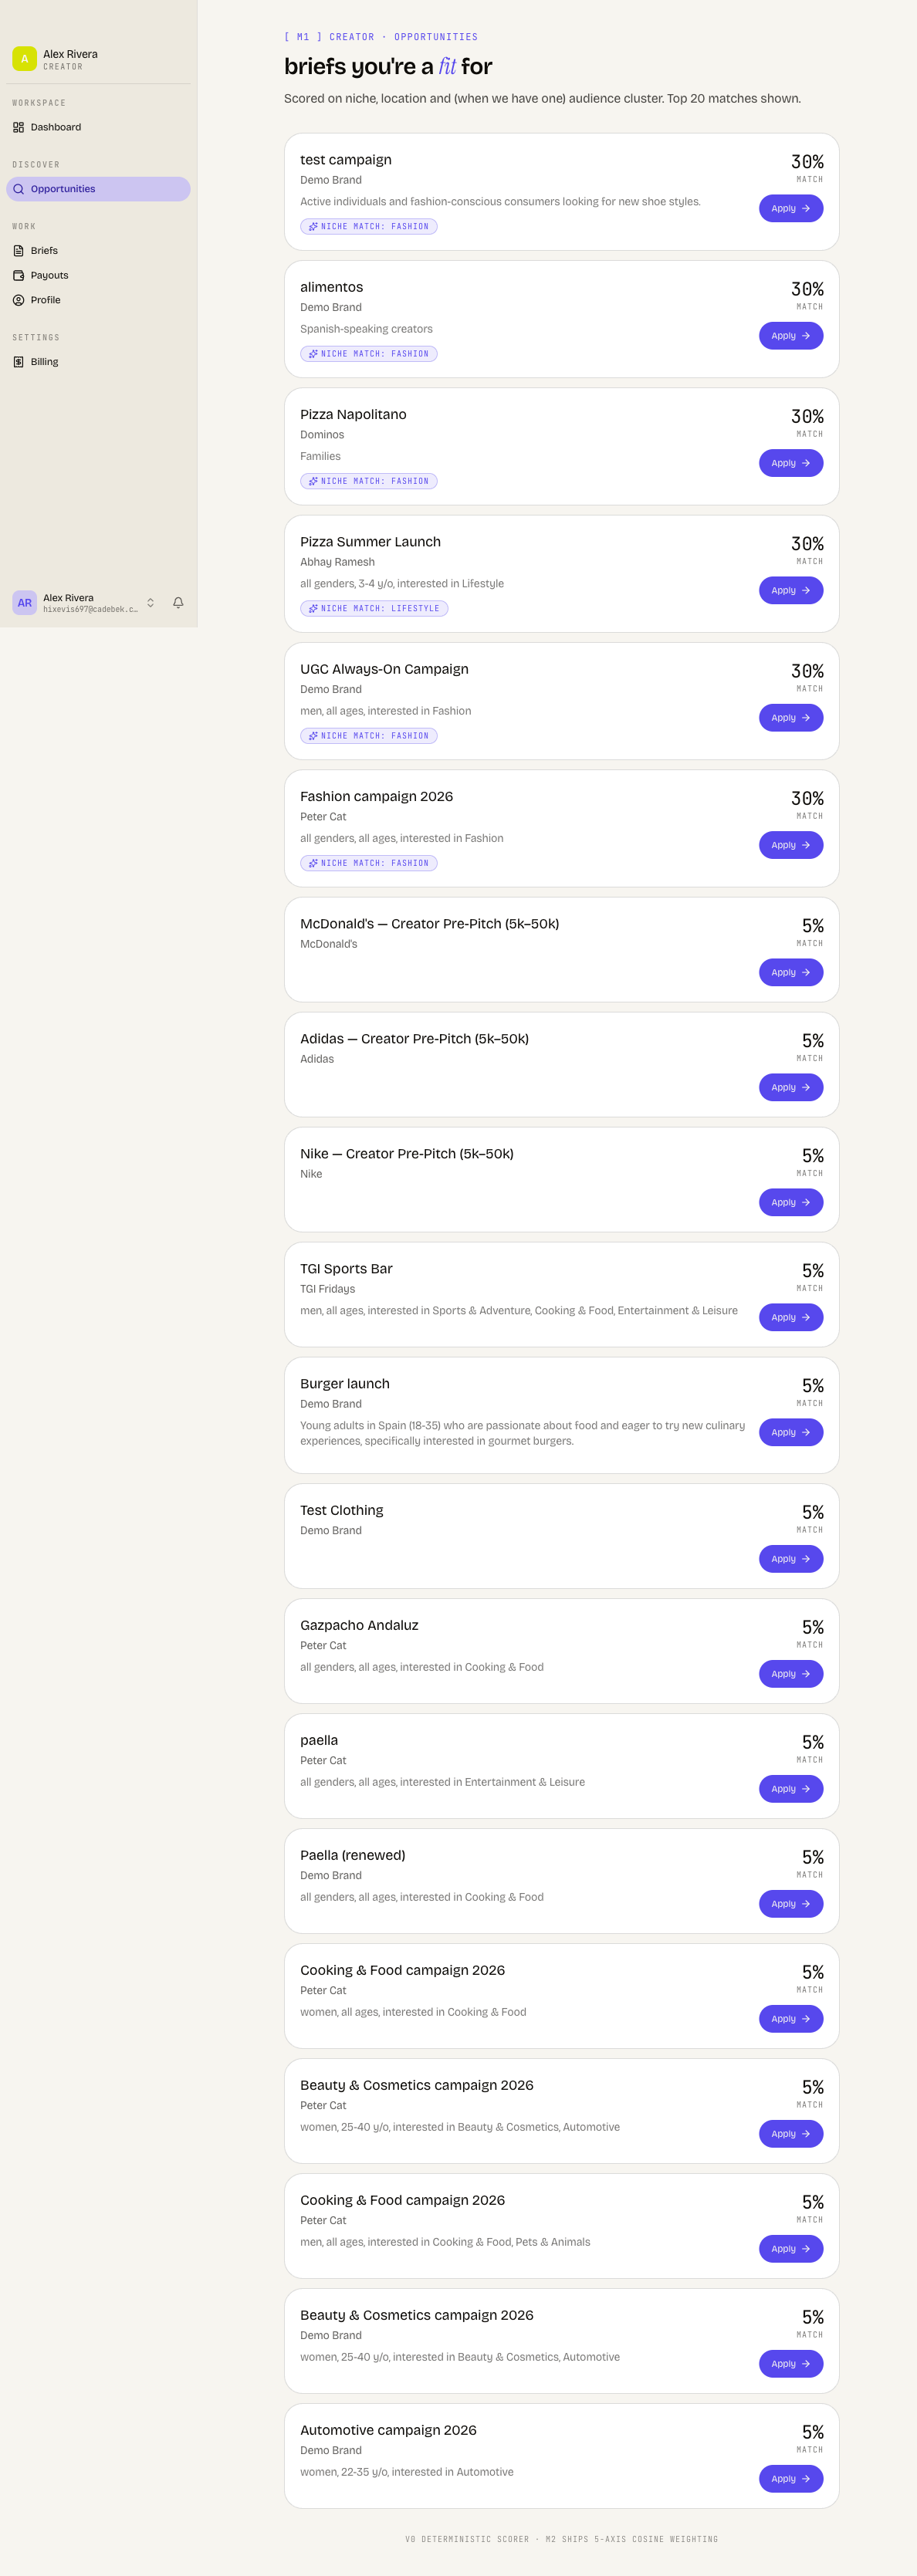
Open Opportunities to see the open briefs you are a fit for. Cyrqle scores every open campaign against your niche, location, and (when available) your audience cluster, then shows your top matches with a percentage score on each card.
Open Opportunities
Go to Opportunities in your creator workspace. Each card shows the campaign name, the brand, a short line about the target audience, and a match percentage.
Read the match signals
Cards carry chips that explain the score: a Niche match chip listing the niches you share, a Same city or Same country chip when your location lines up, and an audience-source chip (for example "Verified IG data", "Platform observation", or "Your survey") showing where the audience data came from.
Apply
Press Apply on any card. Your application is sent and you land on that campaign's brief page. If you have already applied, the card simply shows "Already applied" rather than sending a duplicate.
Empty list? It usually means nothing matches yet. Complete your audience survey and connect at least one platform so brands can find you and your scores can be computed. Briefs appear here the moment one matches.
Find every brief you are on
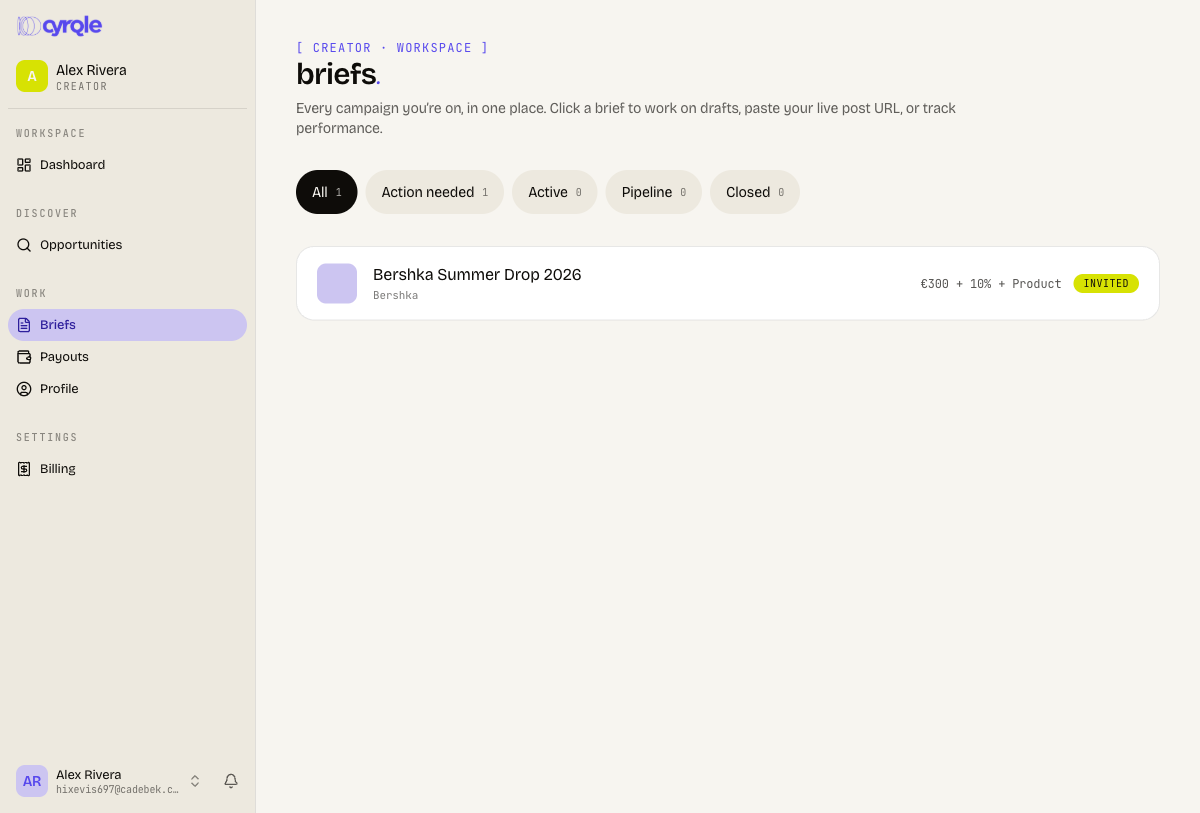
Briefs is your home for every campaign you are part of, whether you applied or a brand invited you. The filter chips group the many internal states into four buckets you actually think in:
- Action needed — the brief is waiting on you (a new invite, a counter from the brand to respond to, or an agreement to sign).
- Active — you are in, working: accepted, under contract, in production, draft submitted, or live.
- Pipeline — you have applied and the brand has not decided yet.
- Closed — declined, withdrawn, expired, or completed.
Each row shows the brand, a short compensation headline when there is a fixed offer, and a status pill. Click any row to open the brief and do the next thing.
Review the offer
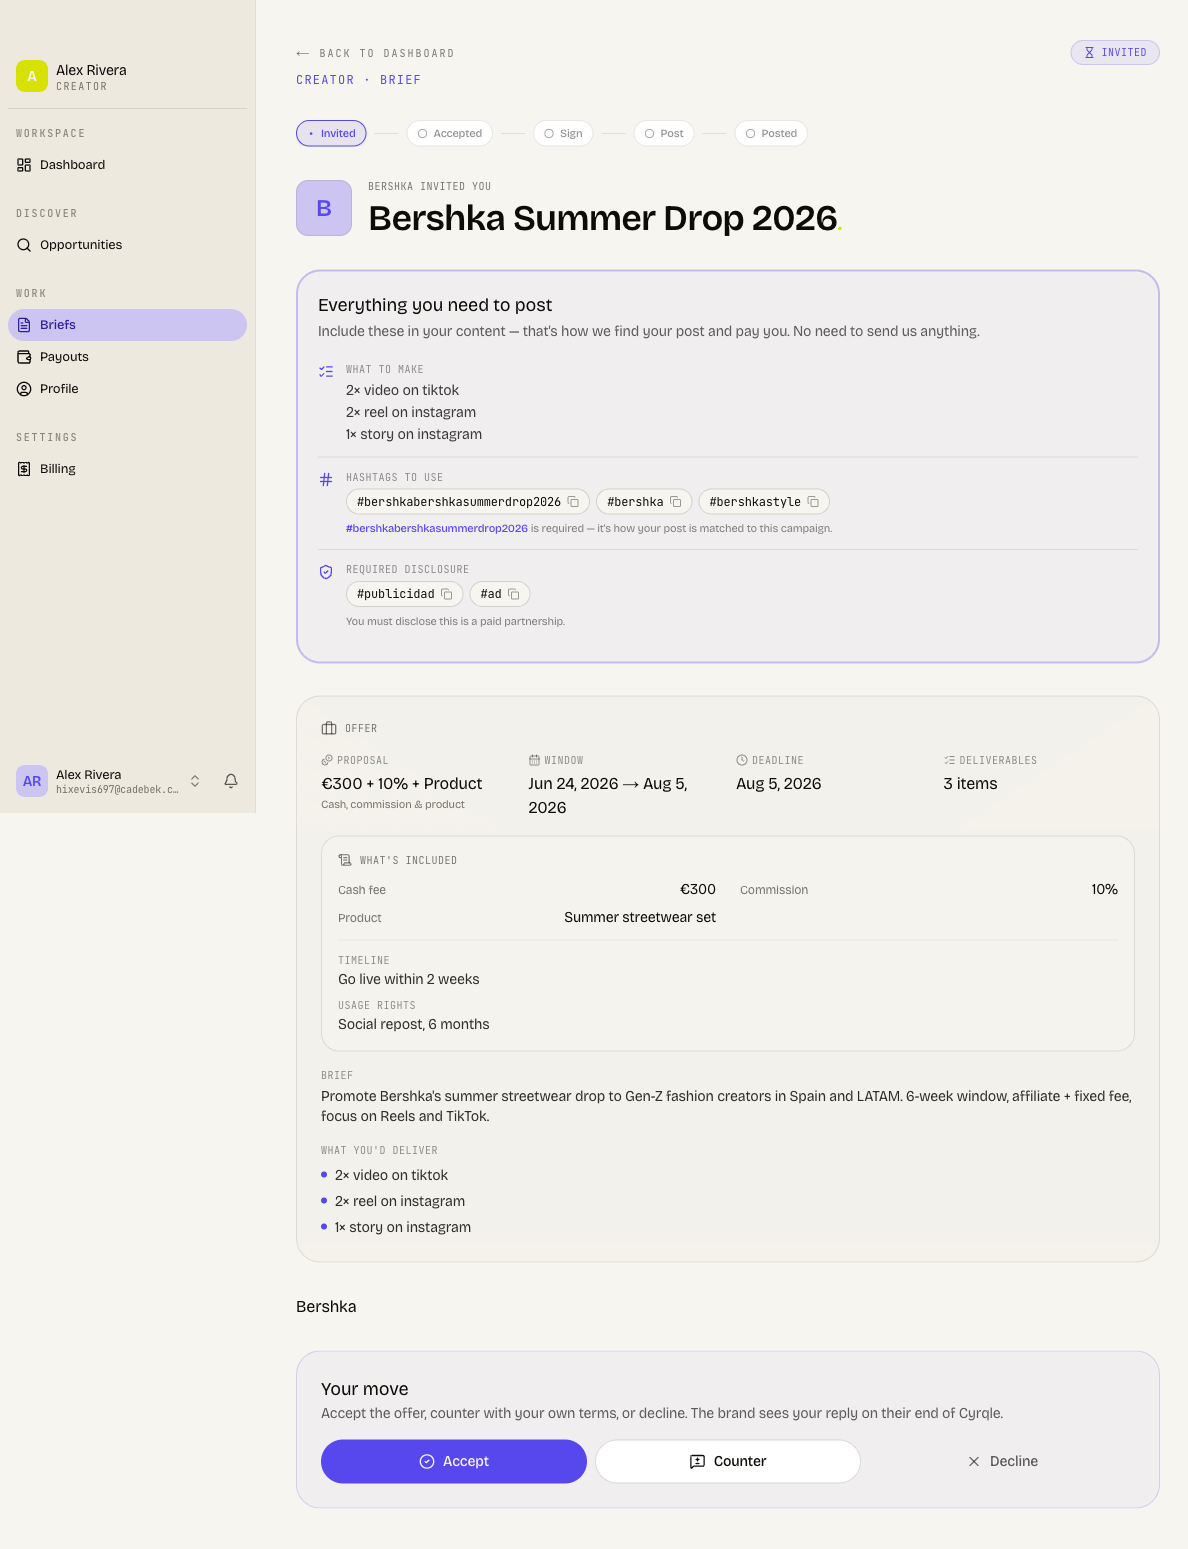
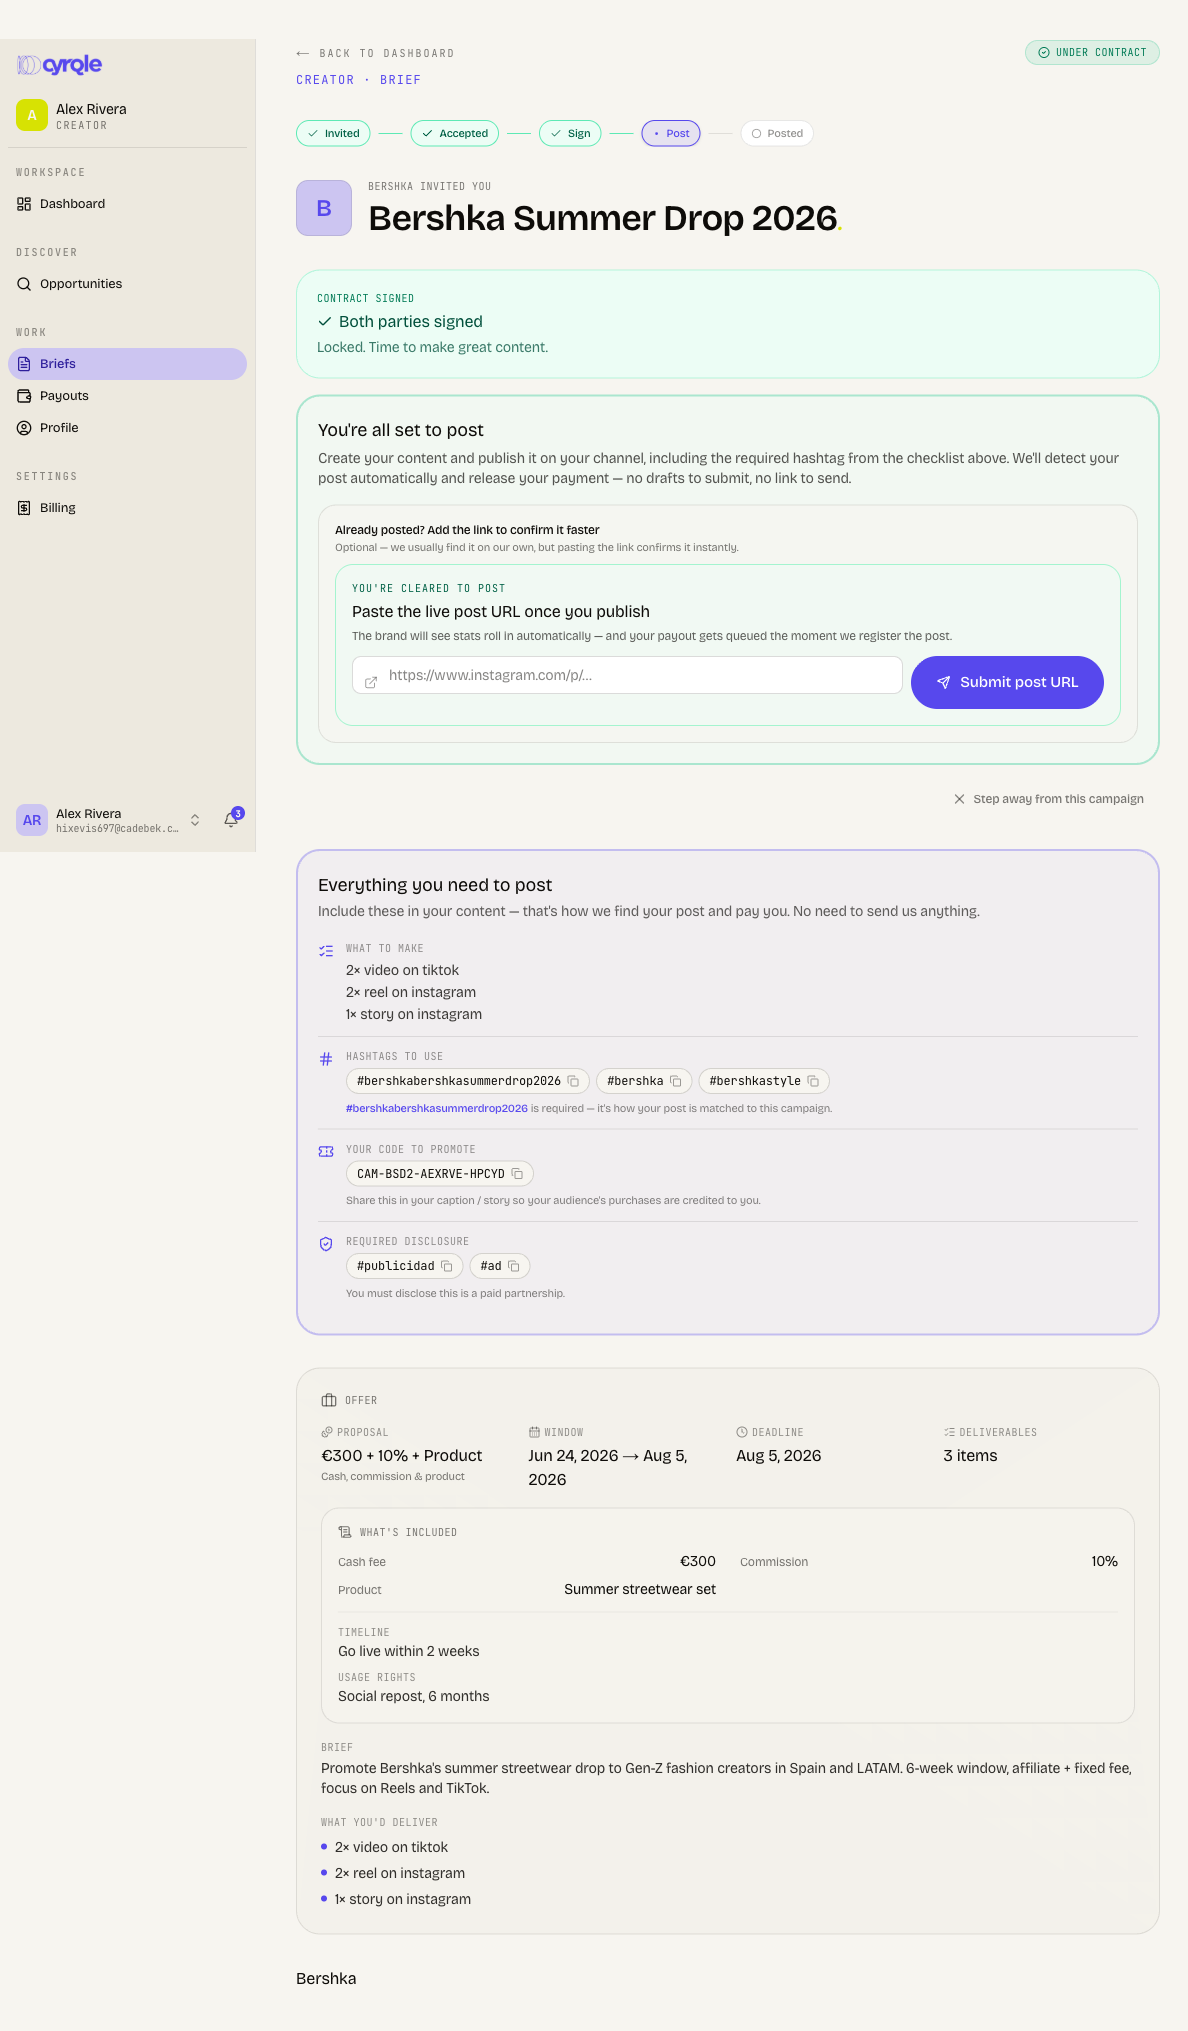
Opening a brief shows everything in one place. A lifecycle strip at the top orients you on where you are and where you are heading. Below that is the offer card, with four key facts:
- Proposal — your compensation, with a type caption underneath. Compensation comes in four modes: Fixed (a set fee), Affiliate (you earn commission on sales through your code or link), Seeding (you receive product), and Hybrid (a mix, for example a fee plus commission). A breakdown lists each component so combined deals read clearly rather than collapsing to a single number.
- Go live / Window — when to post, or the campaign date window if no exact go-live time is set. If a time was set specifically for you, the card says so.
- Deadline — the brief deadline.
- Deliverables — what you are expected to make (for example "2x Reel, 1x Story").
The brief description, the brand's brand kit, and any downloadable assets stream in below. Read these before you respond.
Accept, counter, or decline
While an invitation is still open, the brief shows a three-button action bar. This is your move.
Press Accept to take the offer as written. Cyrqle moves you into the campaign and, behind the scenes, prepares your agreement to sign and issues your personal promo code. Your next step appears right on the same page.
Press Counter to negotiate. A short form lets you propose a new rate (leave it blank to keep the current one), adjust the deliverables, and add a note to the brand explaining why. The brand sees your counter and replies; the invite stays open until you both agree. While it is the brand's turn the brief shows "awaiting brand reply", and when the brand counters back the Accept / Counter / Decline bar returns so you can respond again.
Press Decline to pass. You can add an optional reason for the brand, then Send decline. The brief moves to your Closed bucket.
Counter offers are validated. The rate must be a whole, non-negative number, the deliverables note stays under 600 characters, and your message under 500. If an invitation has already been responded to, it can no longer be countered.
Sign the agreement
Once you accept (or you and the brand agree on terms), a short agreement is prepared automatically. Signing is the gate that unlocks production — you cannot post until it is done.
Wait for your turn (if needed)
If the brand is still signing, the panel reads that the brand is reviewing the contract and that you will be notified when it is your turn.
Review and countersign
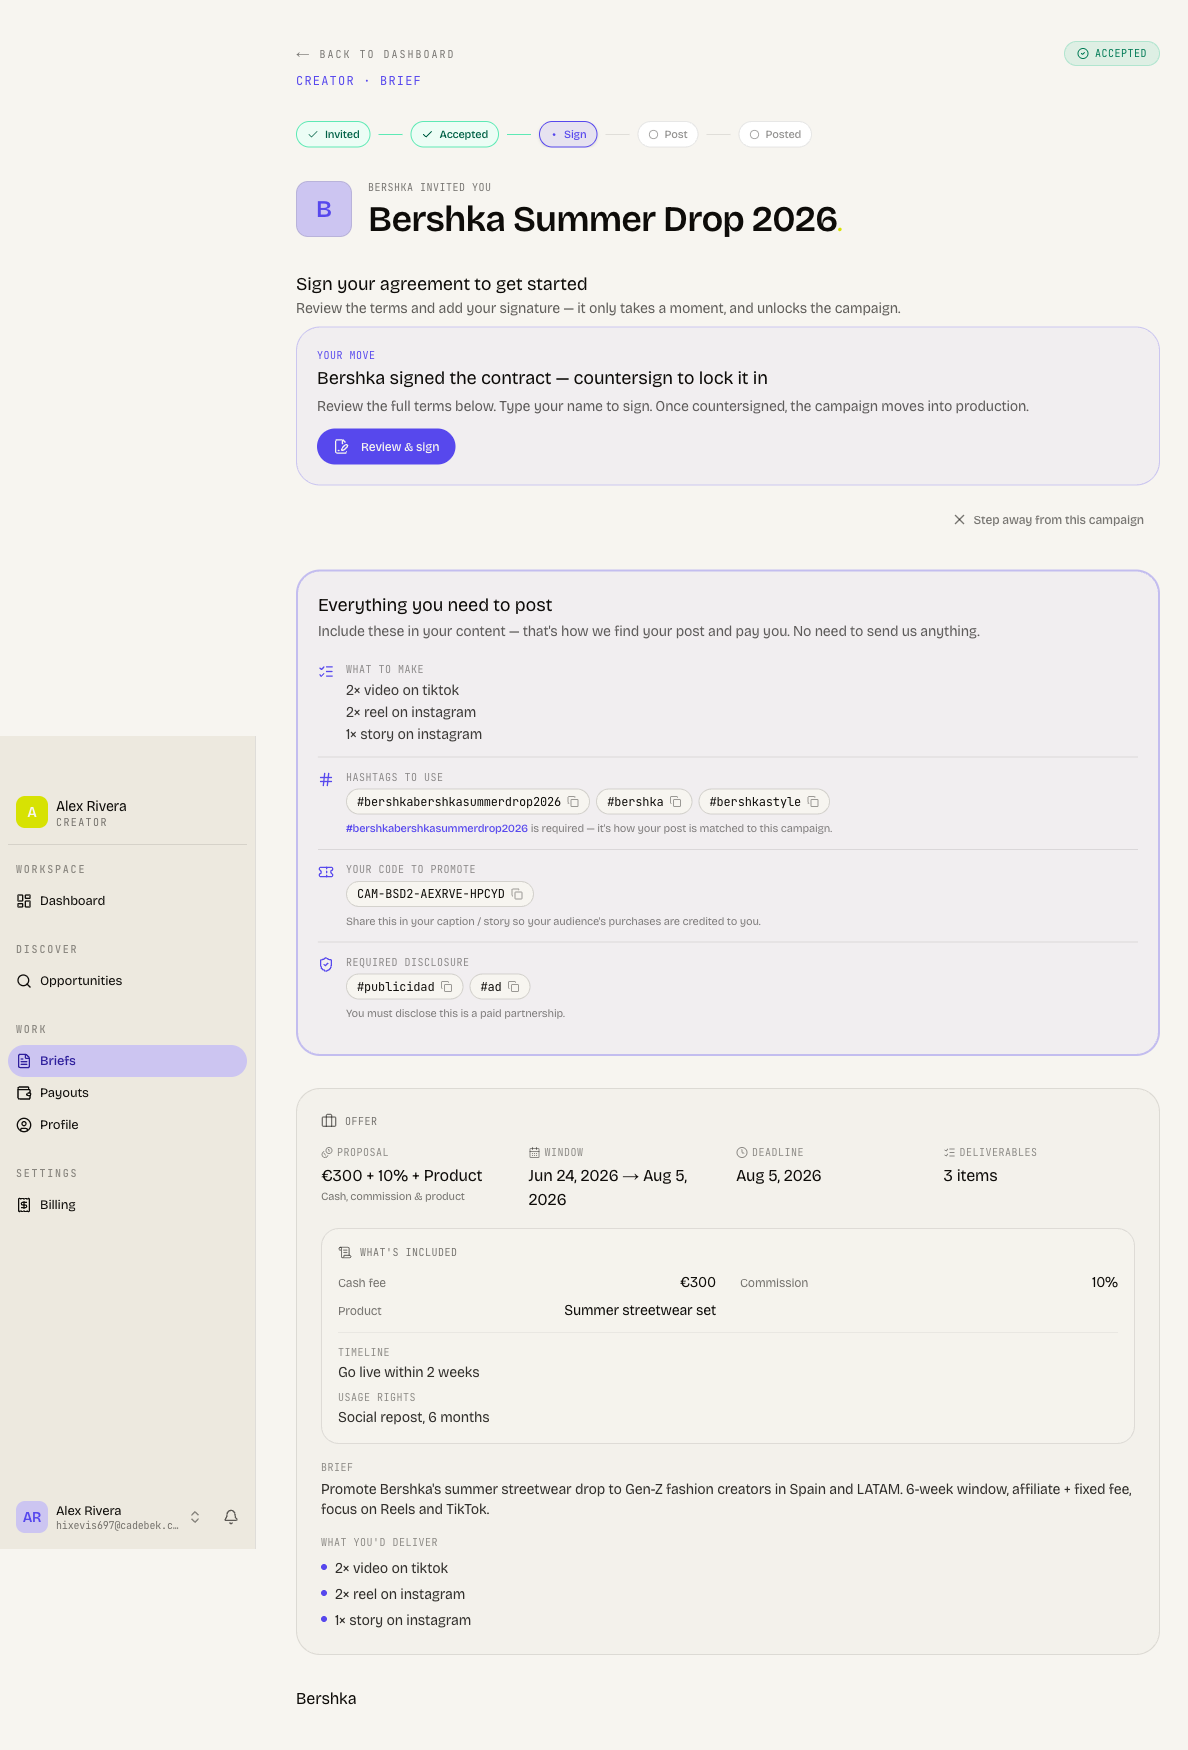
When it is your turn the panel says "Sign your agreement to get started". Press Review and sign, read the terms, type your name to sign, and confirm.
Done
Once both sides have signed, the panel turns green and confirms both parties signed. The campaign is locked in and the produce step appears.
Produce and post
Everything you need to create the content sits in the Everything you need to post checklist on the brief, so you never have to ask the brand. Tap any chip to copy it.
- When to post — your go-live time, if one is set.
- What to make — your deliverables.
- Hashtags to use — the required tracking hashtag (this is how your post is matched to the campaign and how you get paid), plus any extra brand hashtags.
- Tag the brand — the brand handle to @-mention.
- Your code to promote — your personal promo code; share it in your caption or story so your audience's purchases are credited to you.
- Required disclosure — the disclosure tag for your market (for example
#ad). You must disclose that this is a paid partnership. - Do's and don'ts — the brand's content guidelines.
How you finish depends on the campaign type:
An auto-discovery campaign means Cyrqle detects your post by its hashtag. After signing, the brief says "You're all set to post". Create your content, publish it on your channel with the required hashtag from the checklist, and you are done — there are no drafts to submit and no link to send. Cyrqle finds your post automatically and releases your payment. If you want to speed it up, you can paste your post link to confirm it instantly, but this is optional.
An approval campaign means the brand approves a draft before you post. After signing, a Content drafts card appears. Press Start your first draft to open an editor right inside the brief, upload your assets, write your caption, and submit. The brand reviews it inline and either approves it, requests revisions, or rejects it — you iterate in the same place. Once a draft is Approved, paste the link to your published post to complete delivery.
How delivery is confirmed
You do not have to chase anyone. On auto-discovery campaigns Cyrqle watches for your post by its hashtag; once found, the brief shows that your post is in and that your payment is being processed. On approval campaigns, delivery is confirmed once your post link is attached to an approved draft. Either way, the brief flips to a green confirmation, performance updates roll in automatically, and your payout queues up to land on your Payouts page when the brand settles.
Tips
- Connect a platform and finish your audience survey before browsing — it unlocks matches and is required to apply.
- Read the offer breakdown carefully on Affiliate, Seeding, and Hybrid deals so you know exactly what you are earning before you accept.
- If a rate is not right, Counter rather than Decline — the invite stays open while you negotiate.
- Always include the required hashtag and the disclosure tag. The hashtag is how auto-discovery finds your post and triggers payment; the disclosure keeps you compliant.
- On auto-discovery campaigns, pasting your post link is optional but confirms delivery instantly if detection is slow.
- Watch the Action needed filter on Briefs — that is where anything waiting on you (a new counter, an agreement to sign) shows up.